Schedule > GitHub Activity
In studio this week, you will be setting up your team’s GitHub repository and creating your team’s home page.
IMPORTANT: One person from your team will be submitting this to Canvas.
Install Git
Install git on your computer (if you haven’t already):
https://git-scm.com/book/en/v2/Getting-Started-Installing-Git
Do the Tutorial
On your own time, do the GitHub tutorial. It is optional, but recommended for anyone new to GitHub.
- Register for GitHub if you haven’t already
- Watch this overview video
- Enroll in the GitHub Tutorial (PDF version here)
- Refer to the Git Cheat Sheet if you have questions about specific commands.
Setup your team’s repo via GitHub Organizations
Create New Organization
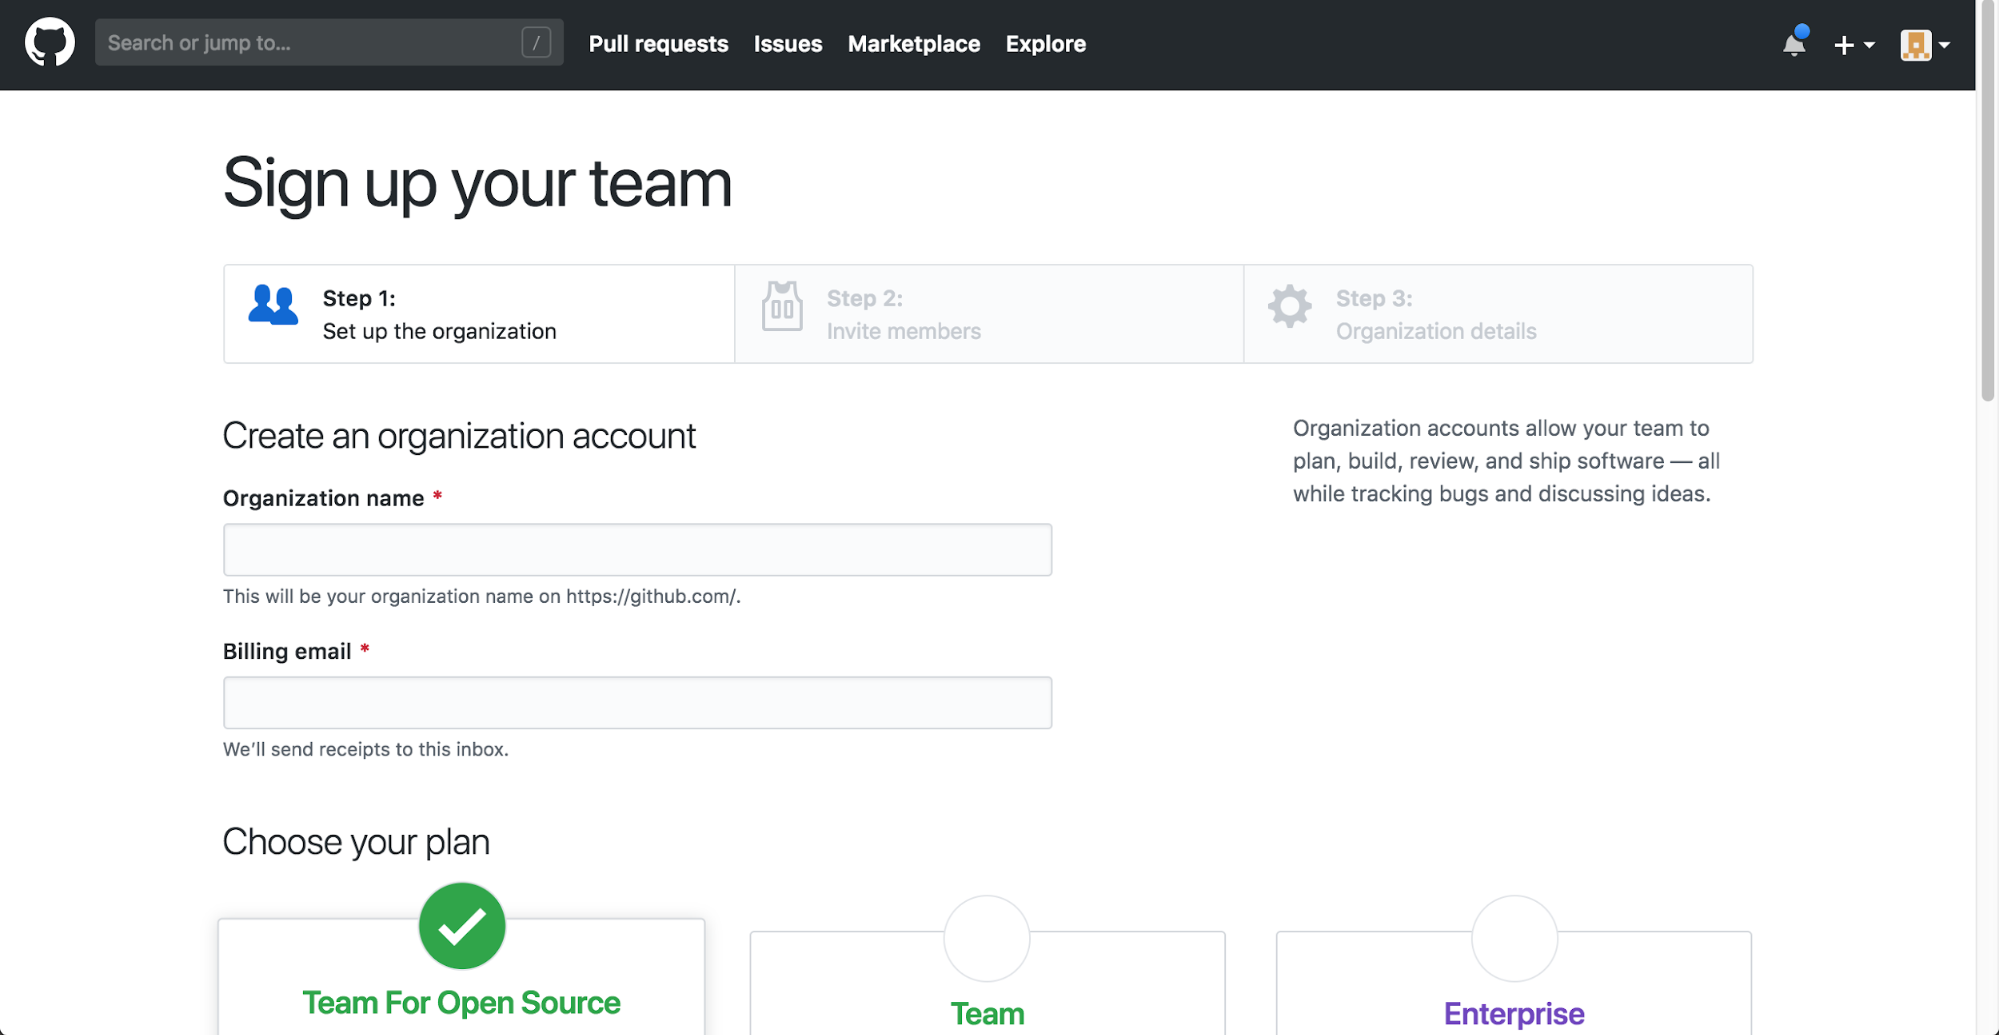
One member of your team needs to create a GitHub organization (name it anything you want). In this example, we named ours EECS 330, but you should name yours something that reflects your team. To do this:
- Log into GitHub
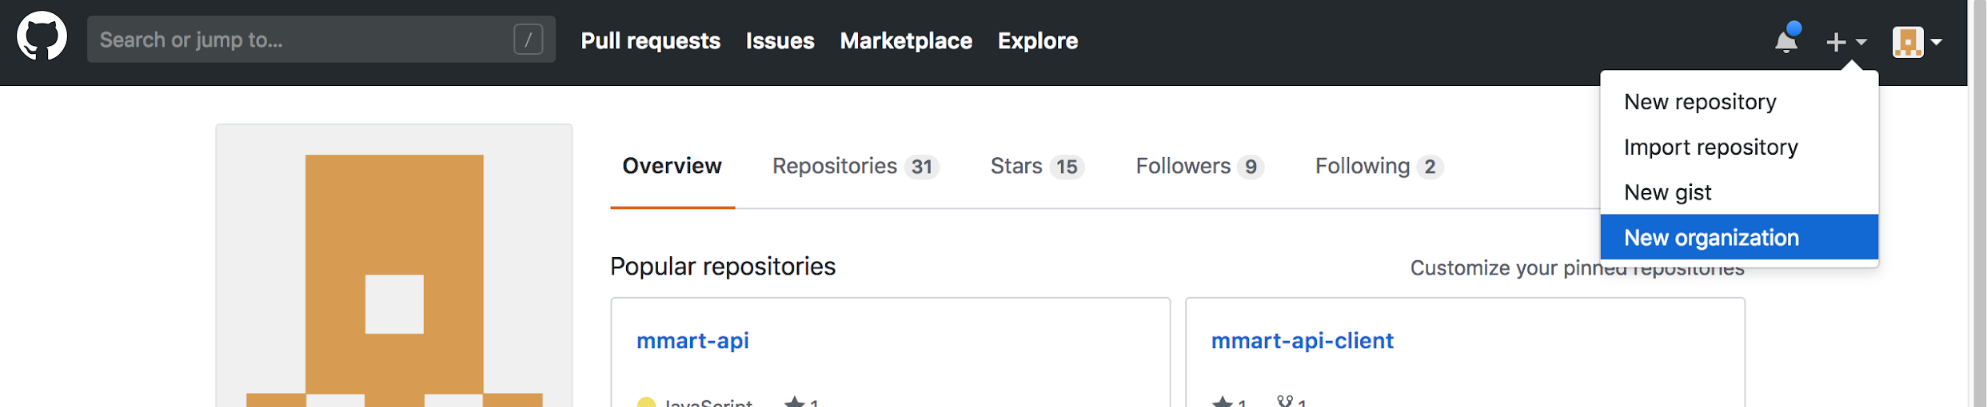
- In the upper right-hand corner, click the plus button, and select “New organization” from the dropdown menu.
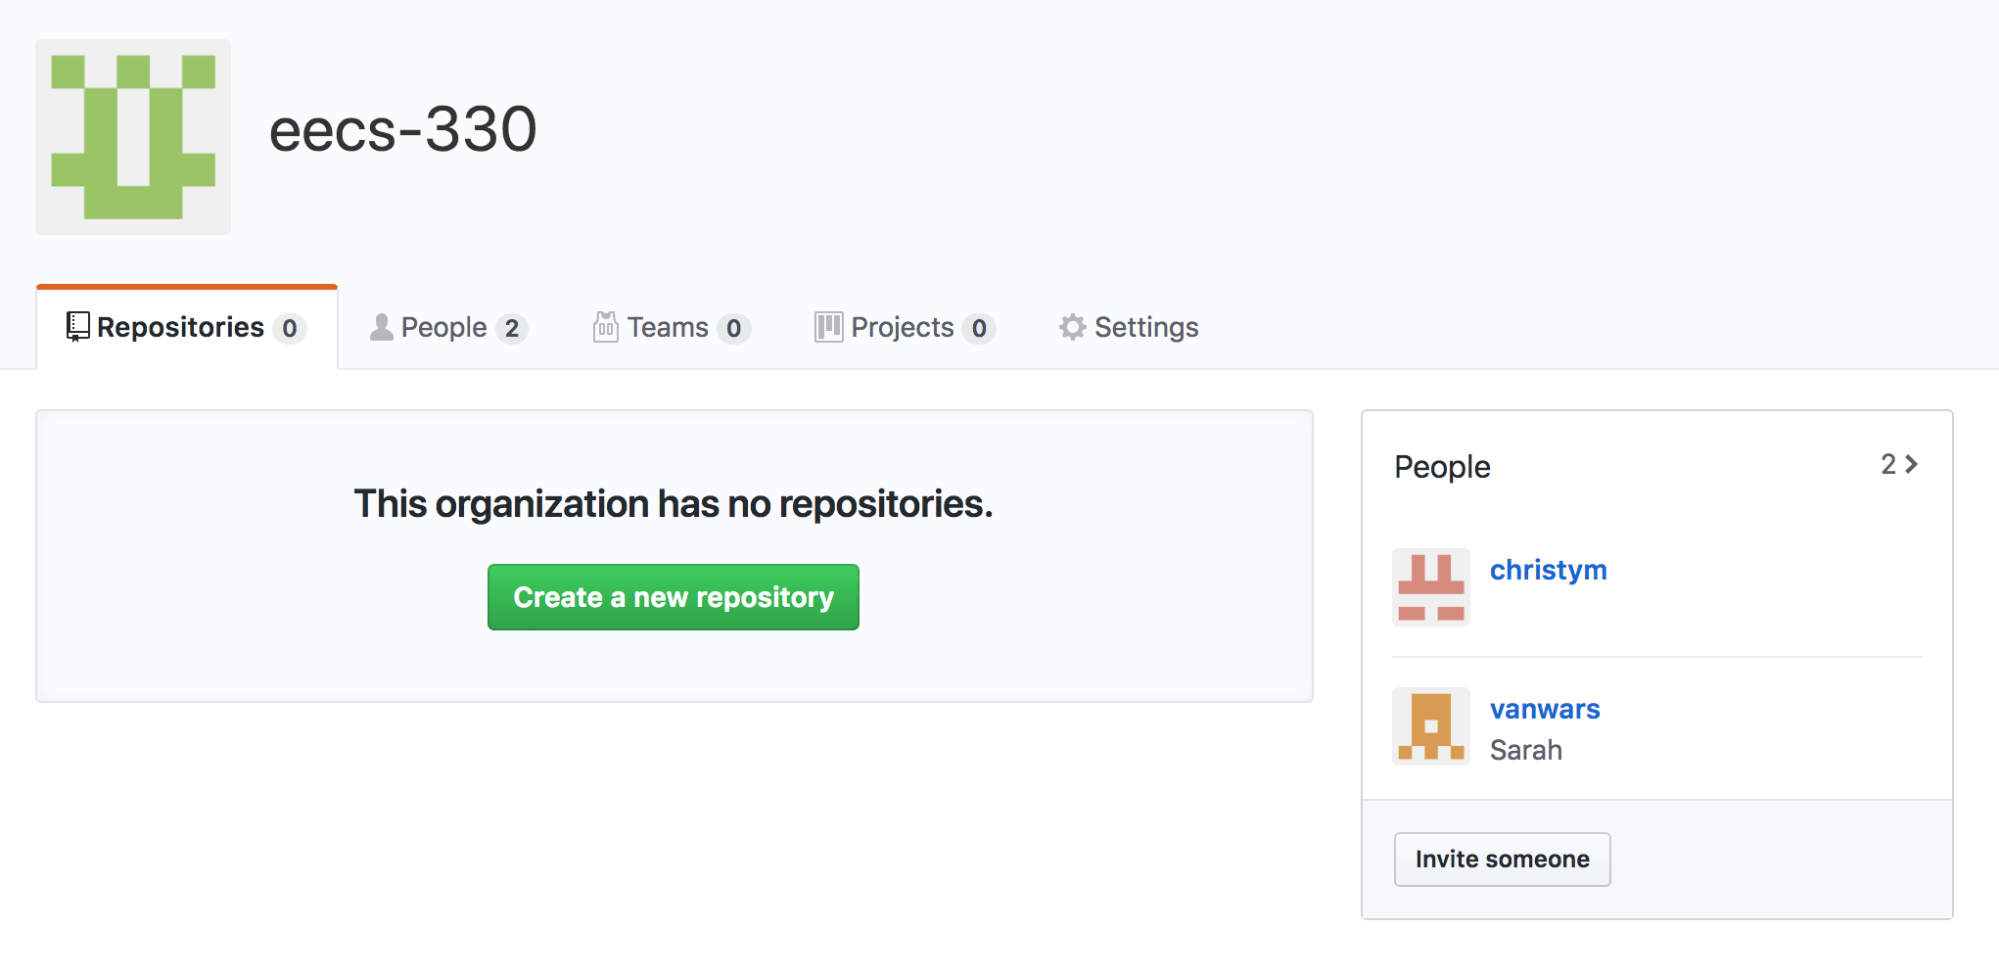
- Once you’ve created the organization, add all of your team members to the organization. Make everyone an owner (to avoid any power differentials across the team).
Please also add your TA to your repository as a manager.
Create a new repo within your organization
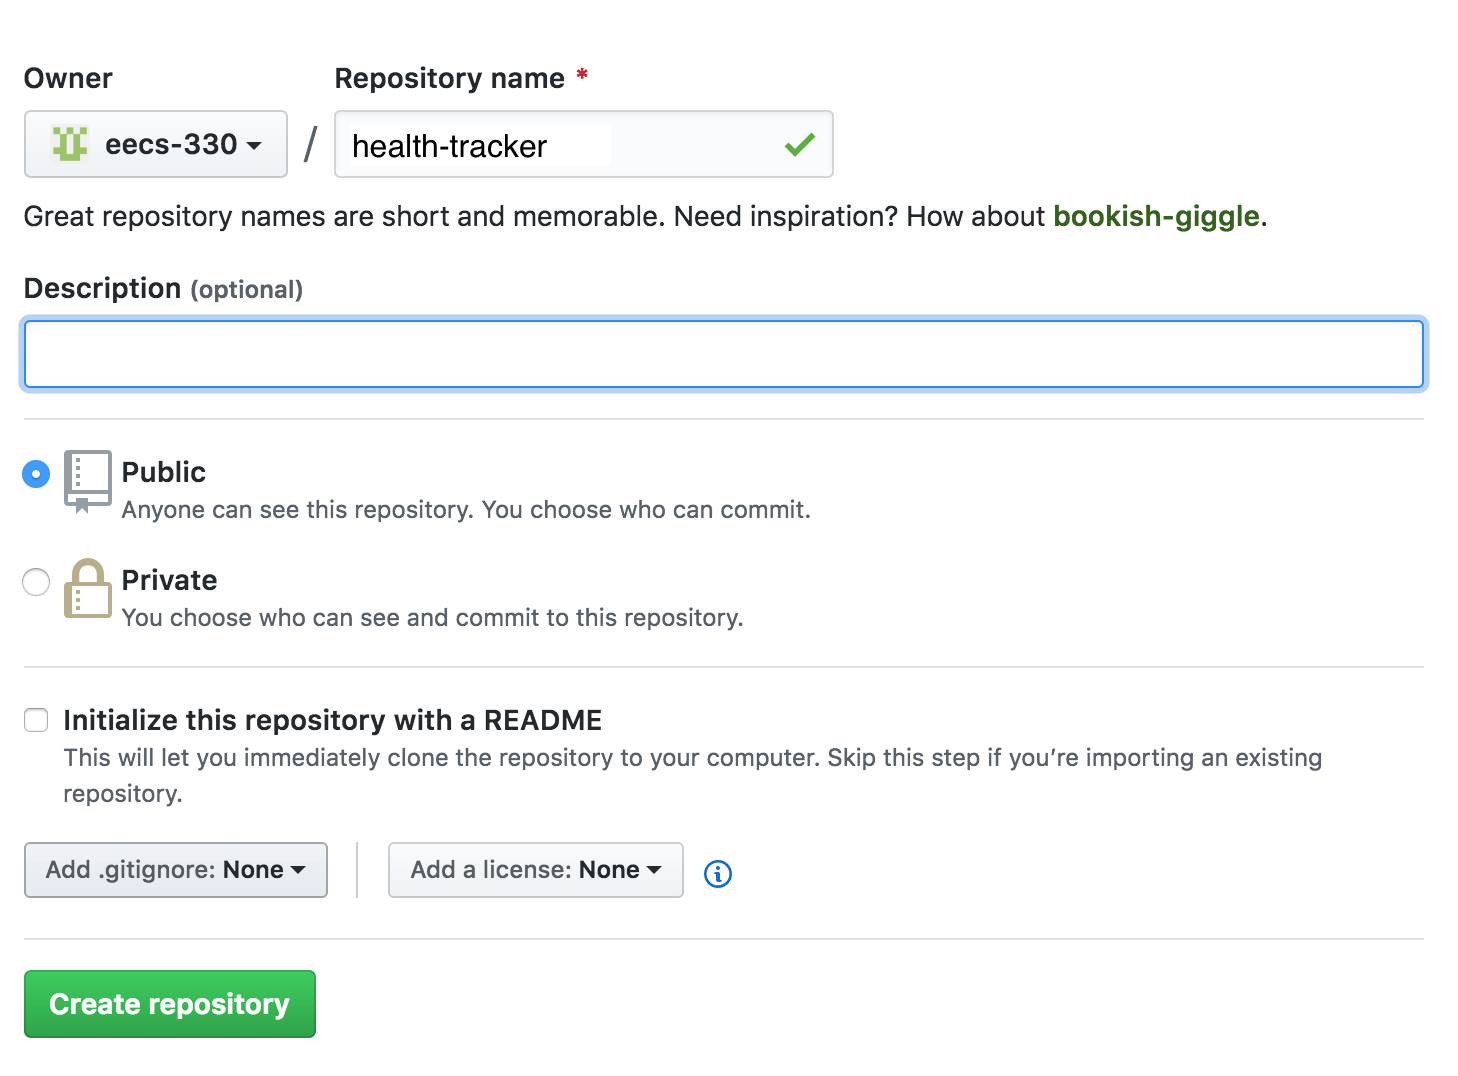
Within your organization, one person needs to create a repository that reflects the name of your project (though you can always rename it later). Don’t name it health-tracker! This is just an example.
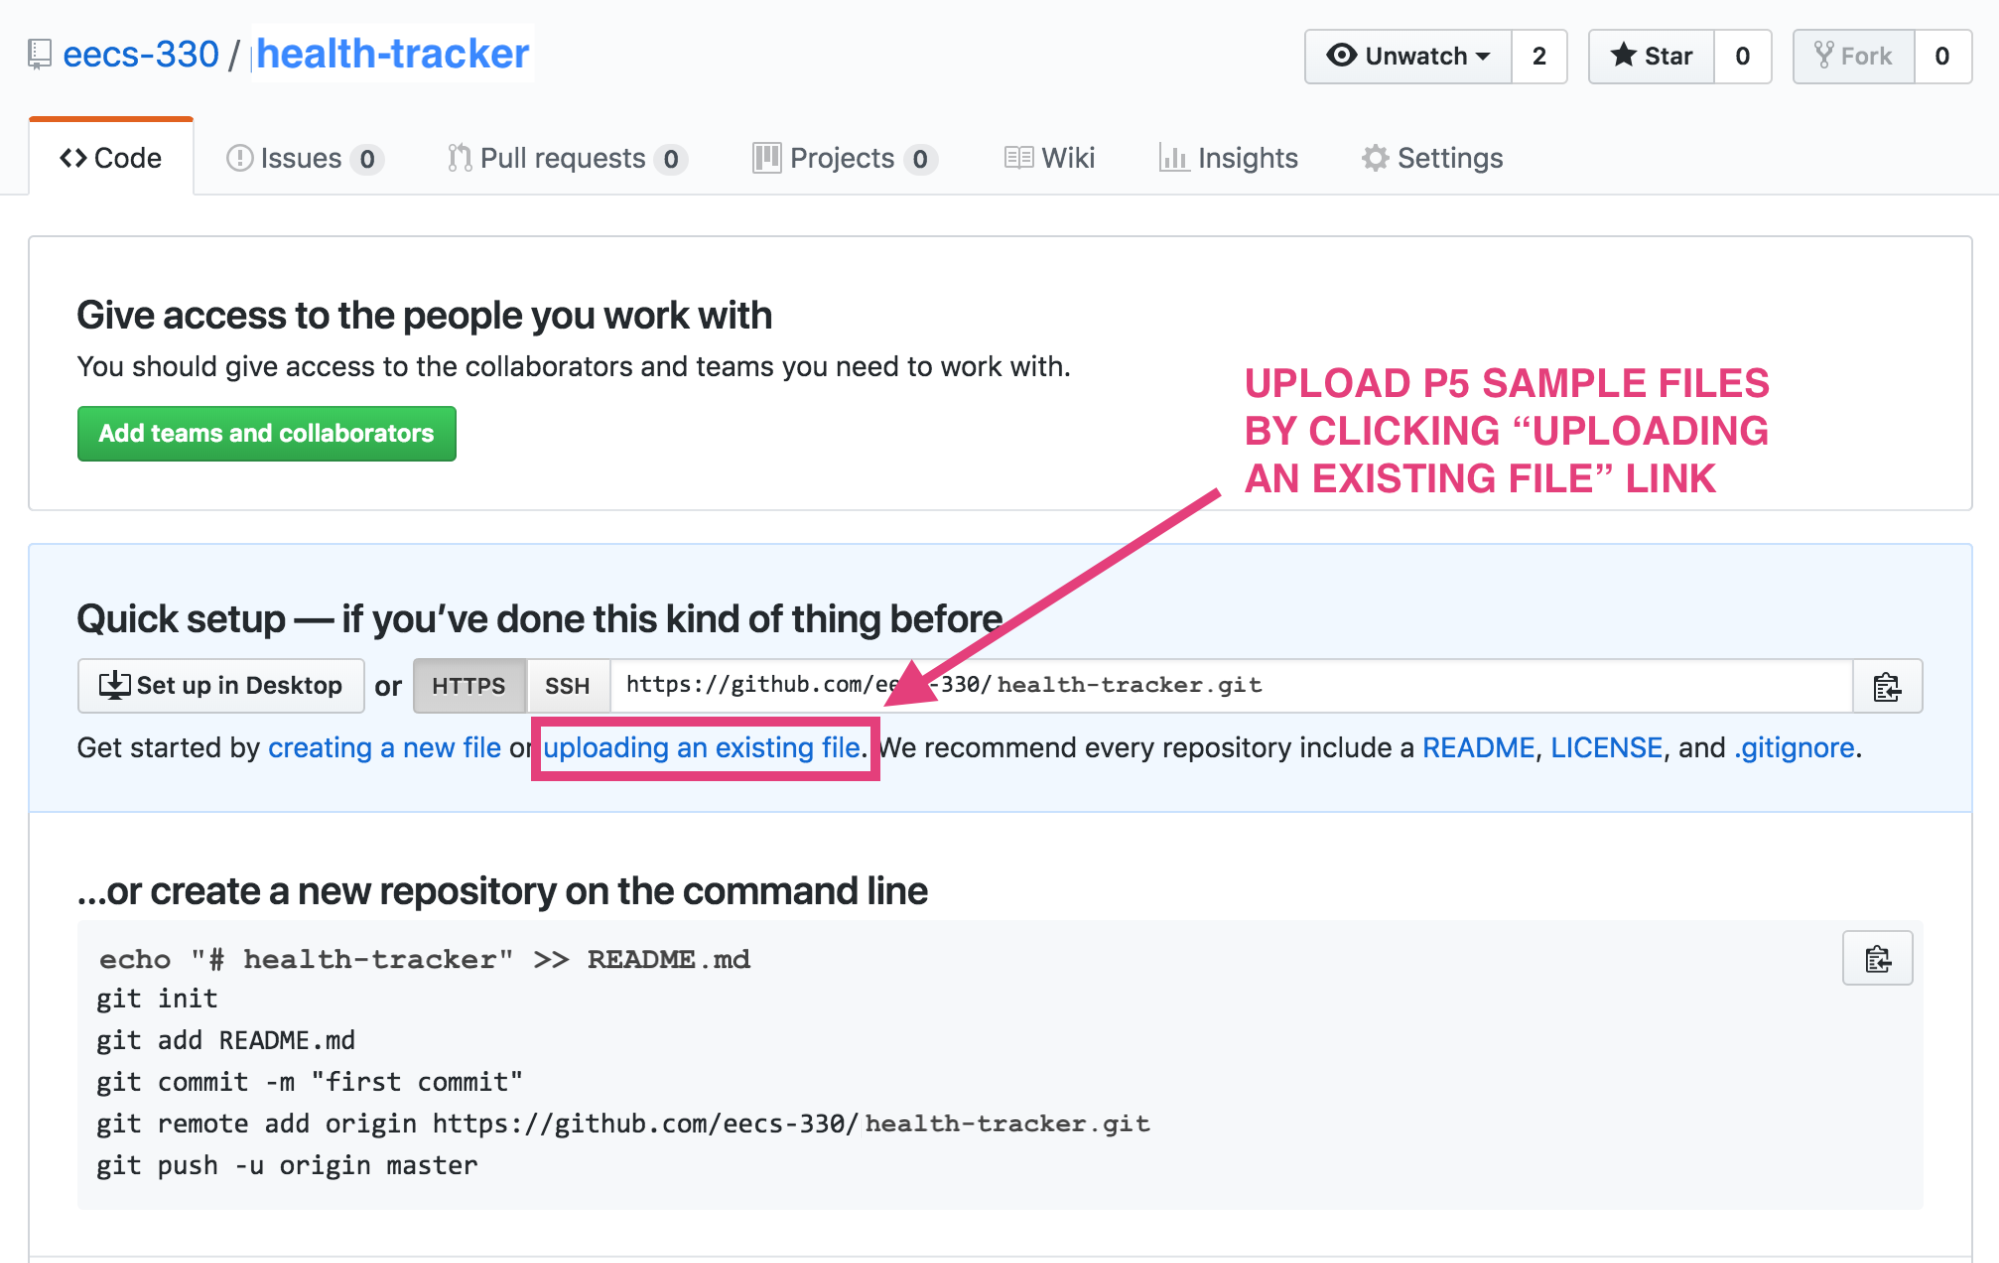
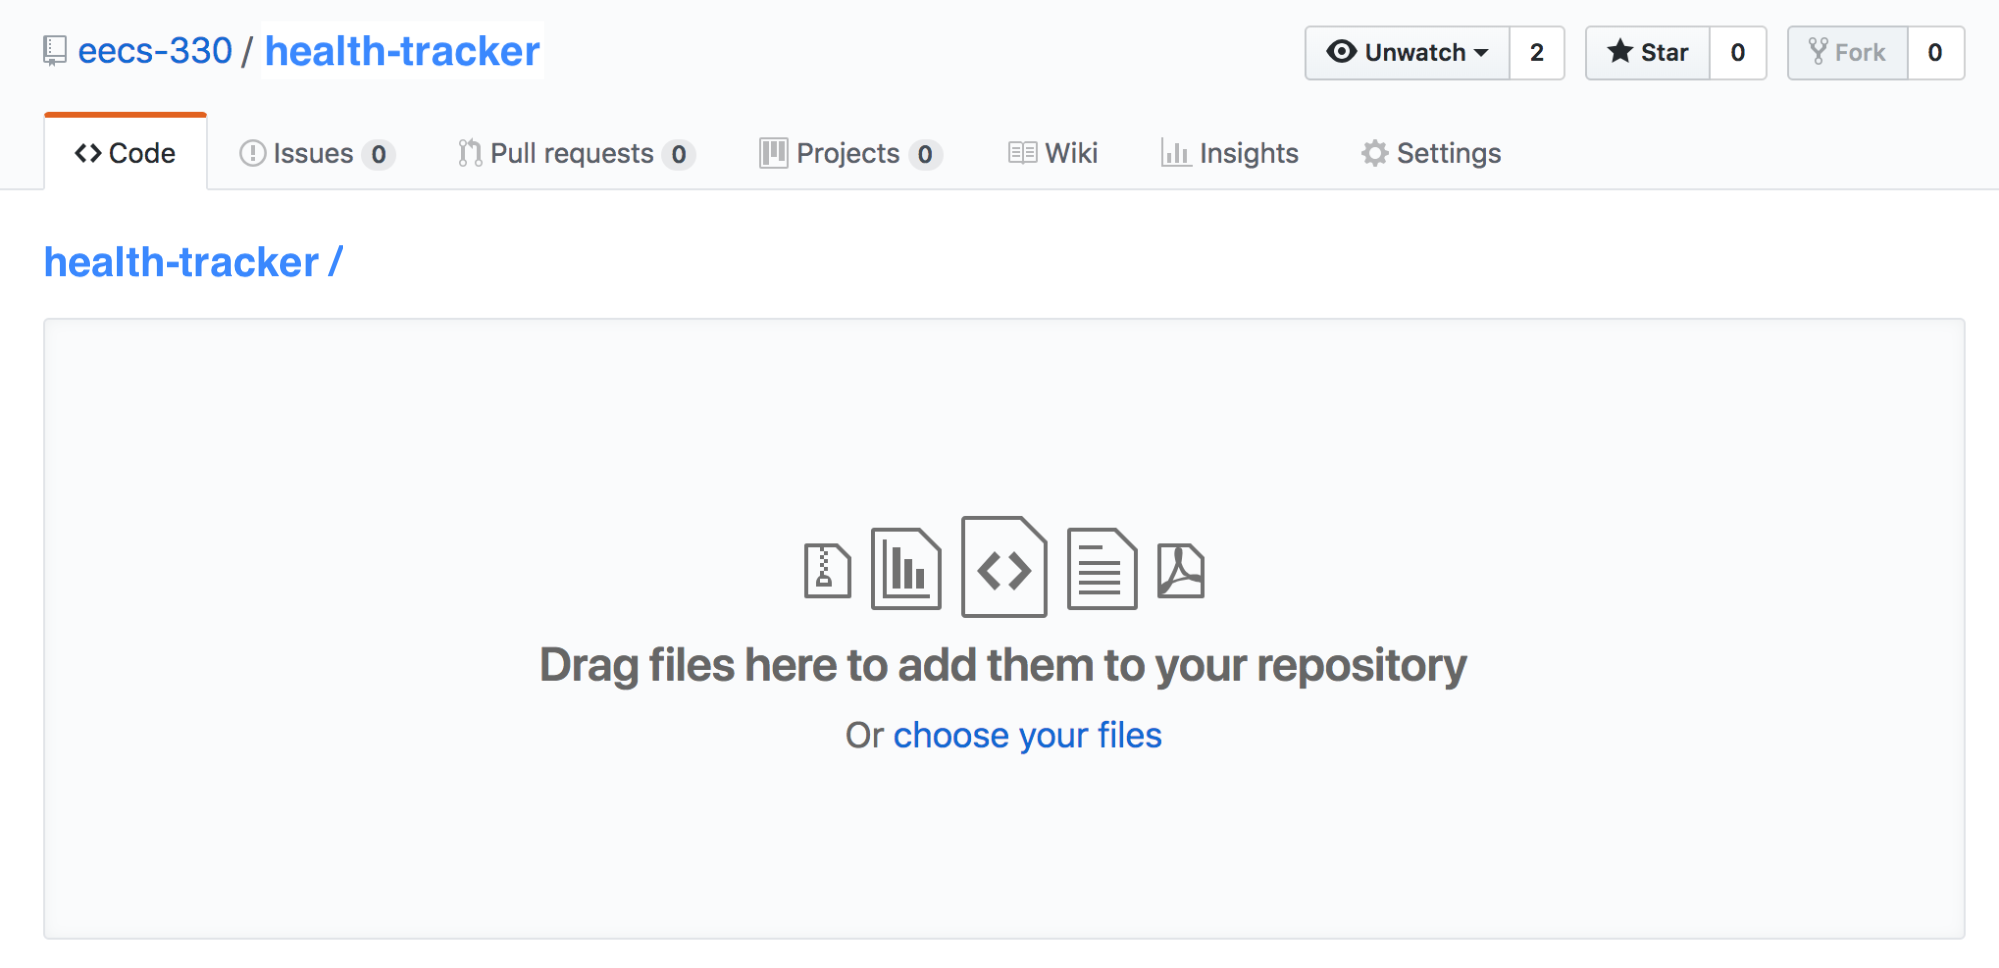
Unzip all of the files from git_tutorial_files.zip and drag them into the “dropzone.” When you’re done, don’t forget to scroll down and press the green commit button. The following files should be included:
.
├── css
│   ├── extras.css
│   └── w3.css
├── images
│   ├── avatar_hat.jpg
│   ├── map.jpg
│   ├── p1.jpg
│   ├── p2.jpg
│   ├── p3.jpg
│   ├── p4.jpg
│   ├── p5.jpg
│   ├── p6.jpg
│   ├── p7.jpg
│   ├── p8.jpg
│   ├── parallax1.jpg
│   ├── parallax2.jpg
│   └── parallax3.jpg
├── index.html
├── page2.html
└── page3.html
└── page4.html
NOTE: You are welcome to use your own project files here (instead of the sample files we have provided). The purpose of this git / GitHub tutorial is that everyone on your team gets practice editing, committing, merging, and reviewing via git/GitHub. The actual files used are not important
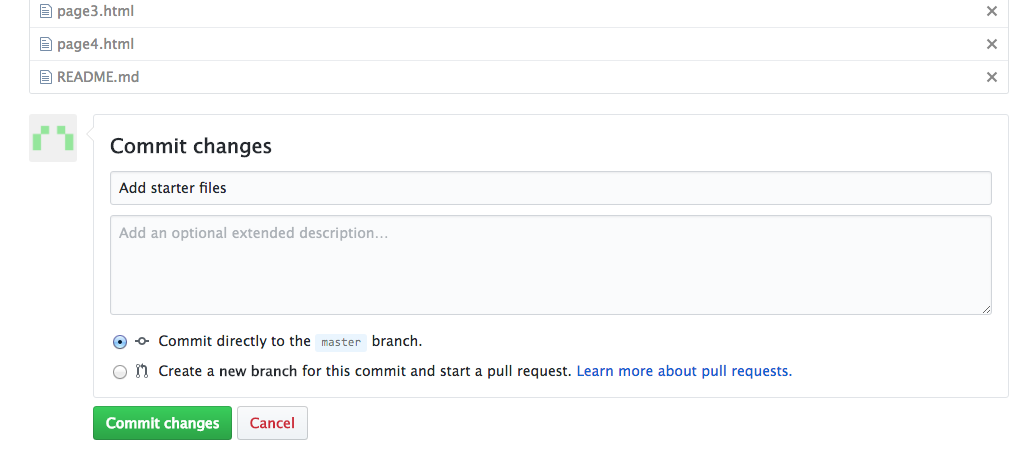
After the files upload, fill out the text box at the bottom of the screen to commit the changes to the master branch of your repository:
Then GitHub will process the files:
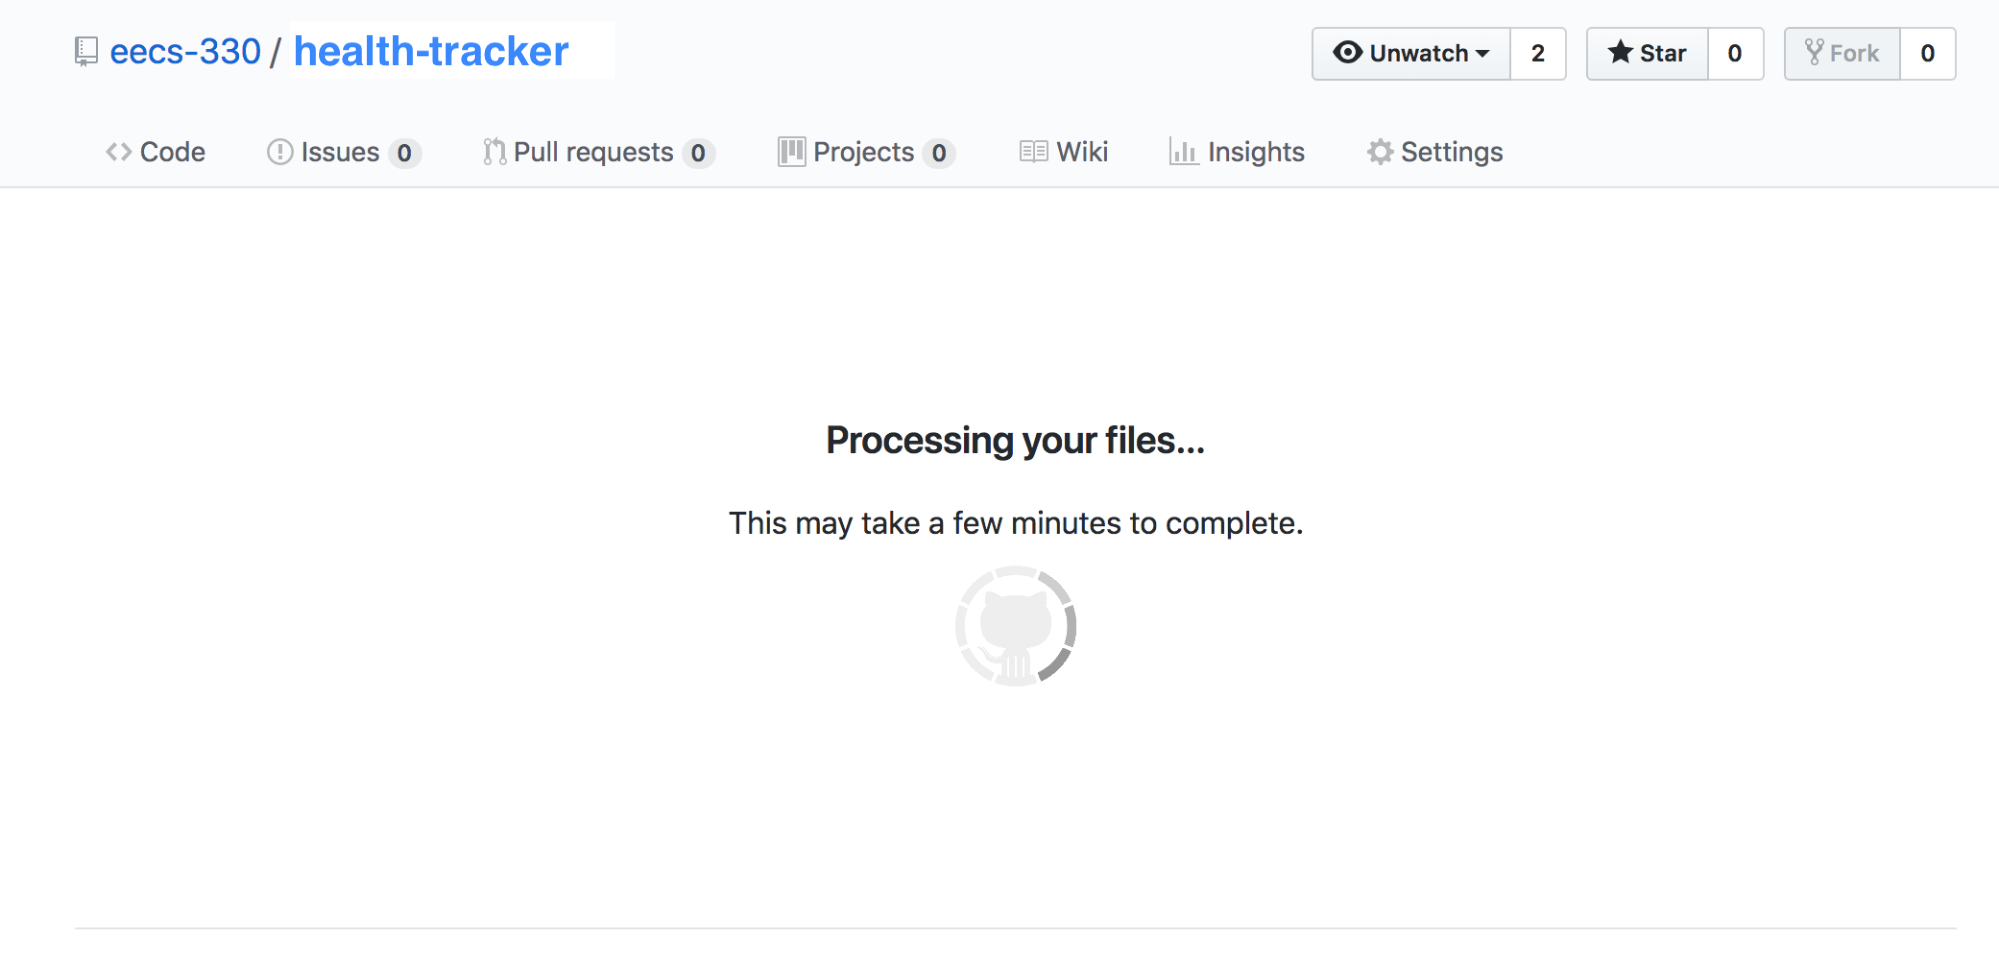
When GitHub is done processing your files, you should see them all listed within the organization’s copy of the repository:

Set up reviewing and merging rules
A key part of the collaborative software development process is review and revision. Typically users are not allowed to approve their own pull requests (PRs) — requests to commit code to the main repository — because review is essential to code quality and team morale. To facilitate reviews, GitHub has some constraints that you can set up to ensure code review and code quality.
Click the settings tab for your repository (towards the upper right-hand side of the screen), and then click the branches tab on the left-hand navigation menu. You are going to add a ‘branch protection rule’ to your master, requiring that at least one person review the pull request (other than the author). Click the “Add rule” button:
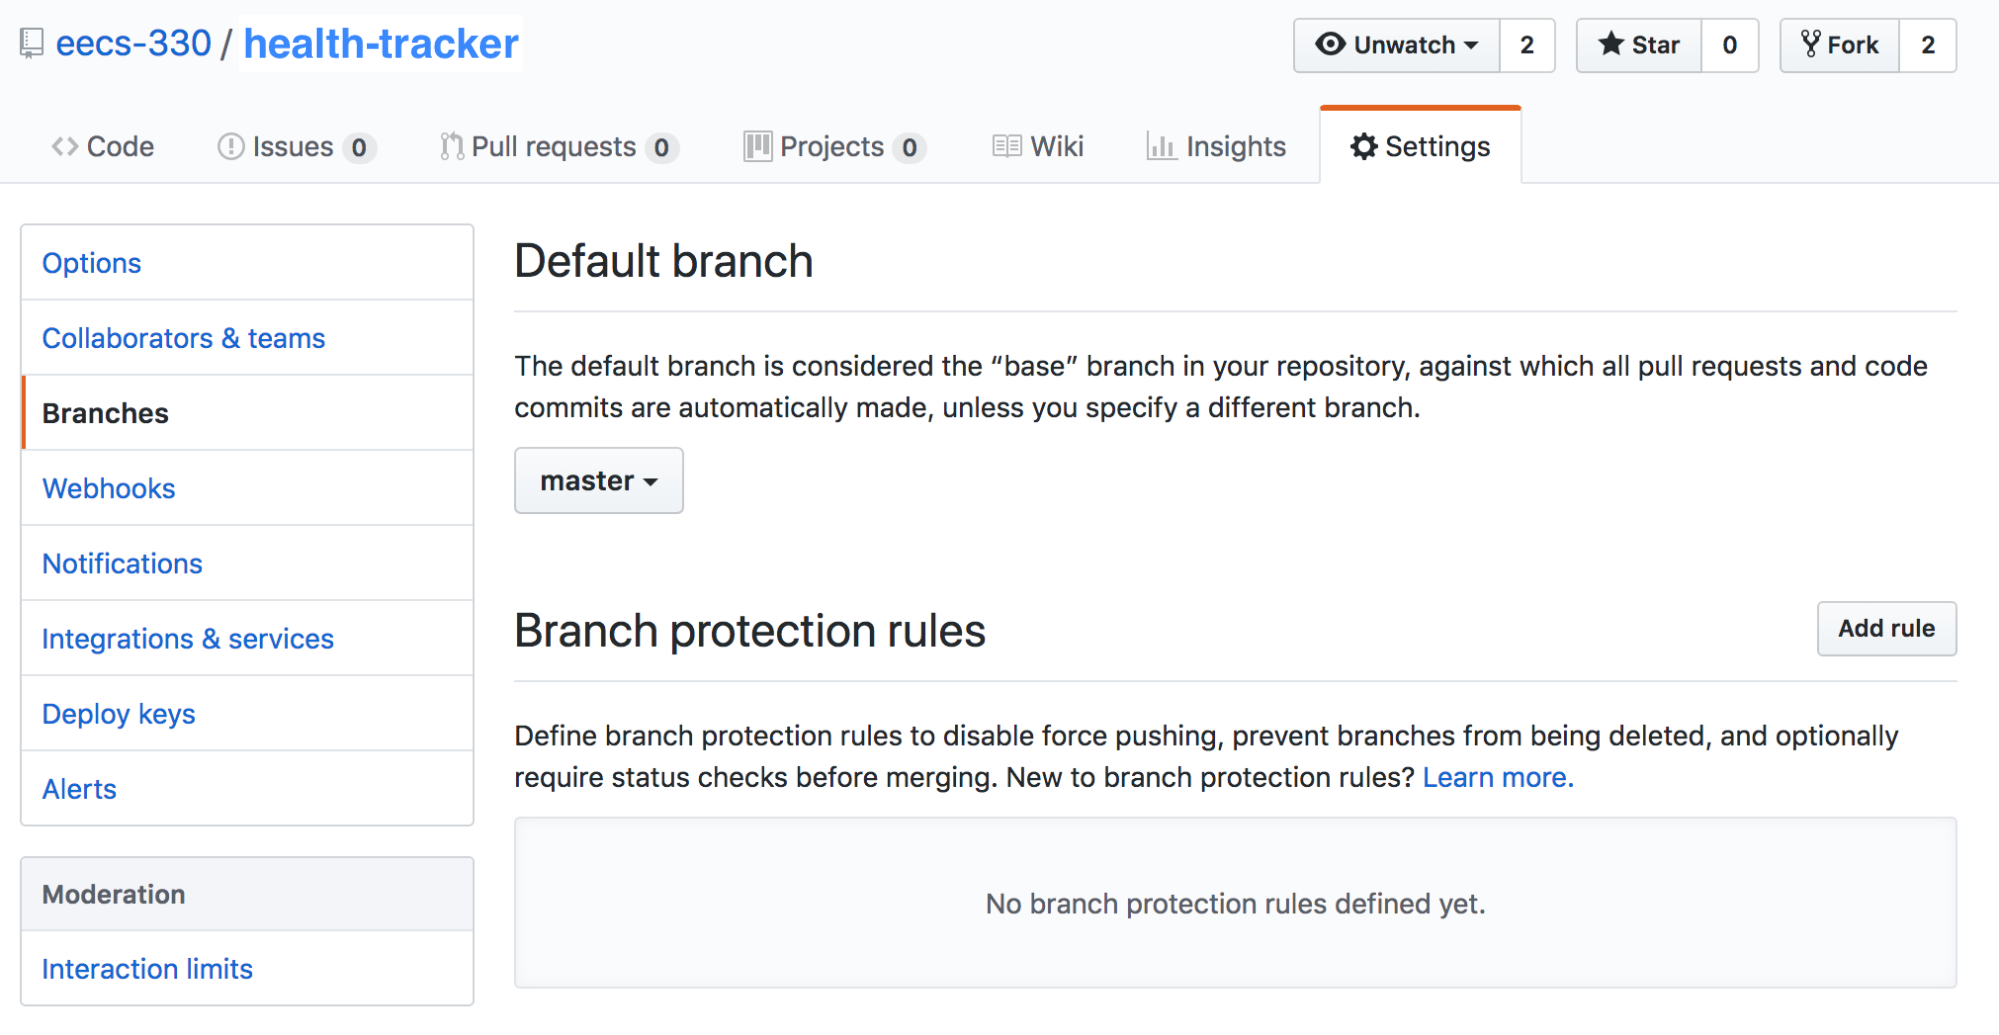
Then, type in “master” in the textbox that says “apply rule to” and check the box next to “Require pull request reviews before merging.” Make sure that 1 review is selected. Don’t forget to click the green “Create” button at the bottom of the page.

Setup your project repo on your local computer
Clone the repository
On your own computer, clone the organization’s repo on your local machine using the command line.
$ git clone https://github.com/name-of-organization/name-of-repo.git
$ cd name-of-repo
Create a new branch
After you clone your repository, each teammate will need to create a branch that has a unique name (since you’ll all be sharing the same repository)
$ git branch git_tutorial        # creates a new branch (name it something meaningful)
$ git checkout git_tutorial      # switches the active branch from master to p5
$ git branch                  # allows you to verify that p5 is now the active branch
  master                      # note: asterisk next to p5 indicates that p5 is active
* p5-vanwars
Edit a file, commit a change, and push the branch
- Each teammate should make a small edit to one HTML file. Either:
index.htmlpage1.htmlpage2.htmlpage3.html
Coordinate with your teammates to decide who is changing which file. - Make edits to your respective HTML files. When you’re done, commit the change and push it to GitHub:
# shows which files changed:
$ git status
# committing all changes w/a message:
$ git commit -am 'Made edit to index.html'
# pushing changes + creating new remote branch called p5:
$ git push --set-upstream origin p5
Create a Pull Request
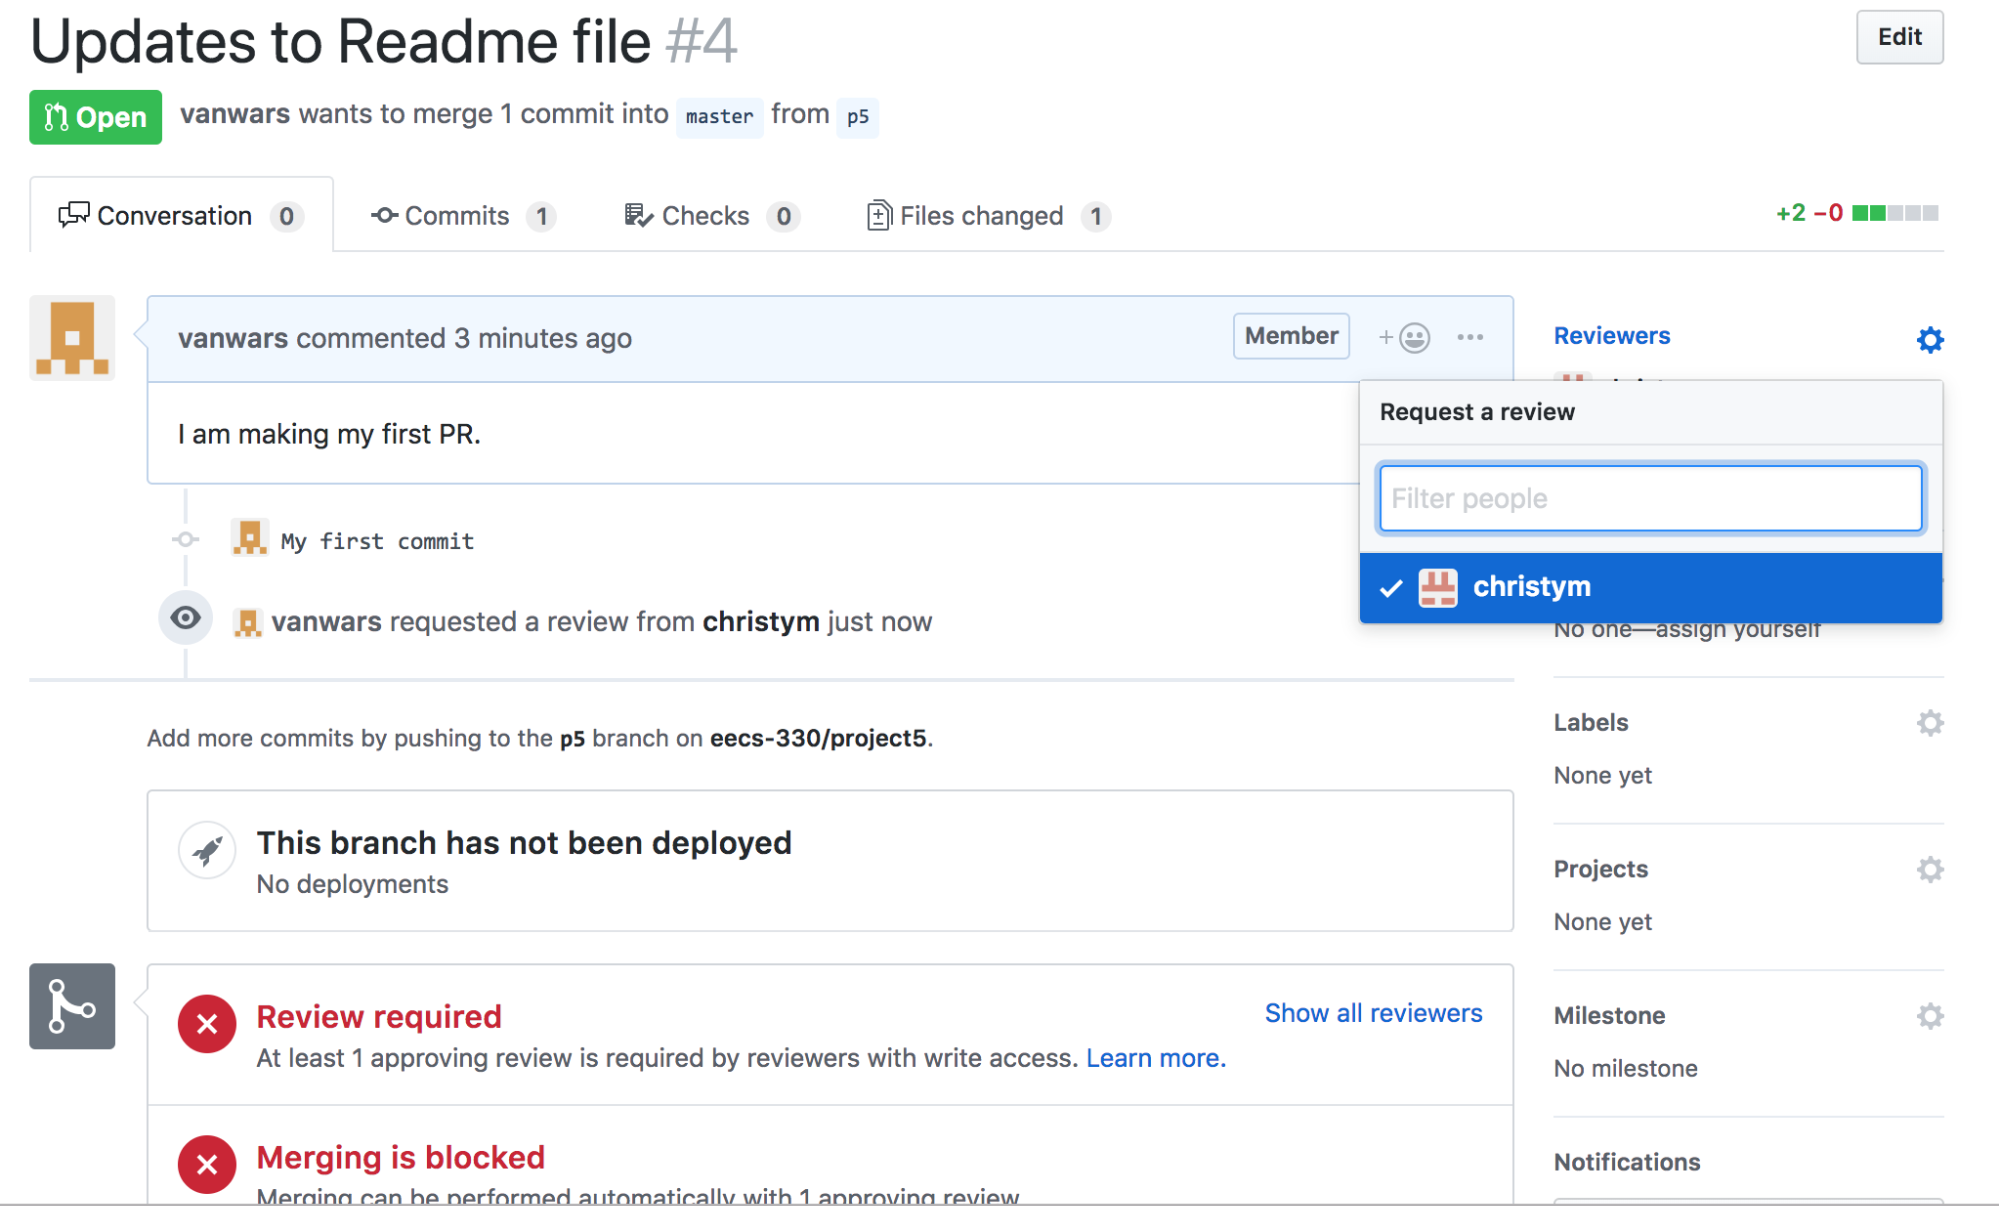
When you’ve pushed your new branch to GitHub, navigate to your organization’s GitHub account in your web browser, and create a Pull Request (PR). A pull request is a way of initiating the formal review process for merging your code into a ‘master’ copy of the codebase. You will be asking to merge your branch with your organization’s master branch. Give your pull request a name and a description and then click the green “Create pull request” button.

Once you have created the pull request, your screen should update such that you will see that merging is blocked because you need one reviewer to approve your PR. On the right-hand side menu, you will click the “Reviewers” link and assign a reviewer to review your PR. Note: you won’t be able to review your own PR, only someone else’s.
Review and Merge Pull Requests
- On your organization’s GitHub page, navigate to the pull requests tab.
- Click on a pull request and click the green “Add your review” button Take a look at the code.

- You may either approve it or request changes and gesture to particular lines of particular files. For now, just approve it and click the “Approve” radio button, and click the green “Submit review” button.

- The PR is now ready to be merged. Click the green “Merge pull request” button to merge your teammate’s change with your organization’s master branch.

- Once your PR has been merged, you can delete your branch on Github (you can always make it again if needed).
Sync your organization’s repo with your local computer
When a change has been made to your organization’s repository, it’s important that everyone on your team “pulls” that change into their local copy of the codebase (on their respective local computers). To do this, execute the following commands on the command line:
# switch branches back to master (IMPORTANT)
$ git checkout master
# fetch all of the changes from your organization’s (i.e. upstream) master
$ git pull
After completing these new steps, you can either (a) merge these new changes into the branch you’re currently working on locally, or (b) create a brand new branch from the newly updated master branch.
Merge new changes into a branch you’re already working on
Once you’ve pulled files down from your team’s master branch on GitHub, you need to merge them into the branch you were working on. To do this:
# switch from master branch back to the branch you were working on:
$ git checkout my-branch
# merge all of the most recent changes to the repo (now in master)
# into your branch:
$ git merge master
Create a brand new branch from master
Before you create a branch, first ensure that you are currently on master. This will ensure that your new branch starts out identical to master:
$ git checkout master
$ git branch
# create your new branch (replace <name-of-new-branch> with an actual name):
$ git branch <name-of-new-branch>
# check out your new branch and get to work:
$ git checkout <name-of-new-branch>
After creating and checking out your new branch, you’re ready to get to work again. And remember, to push your new branch to GitHub, do this:
# replace <name-of-new-branch> with an actual name
$ git push --set-upstream origin <name-of-new-branch>
IMPORTANT: DO NOT MAKE CHANGES TO YOUR LOCAL COPY OF THE MASTER BRANCH. The master branch is just for pulling down the latest changes from your organization’s repo to your local machine.
Enable GitHub Pages
GitHub also allows you to host pages. To enable GitHub pages, go to your organization’s repository and click on the settings tab. Then, scroll halfway down to the GitHub Pages section, and in the dropdown menu below “Source,” select your master branch and then click the “Save” button.
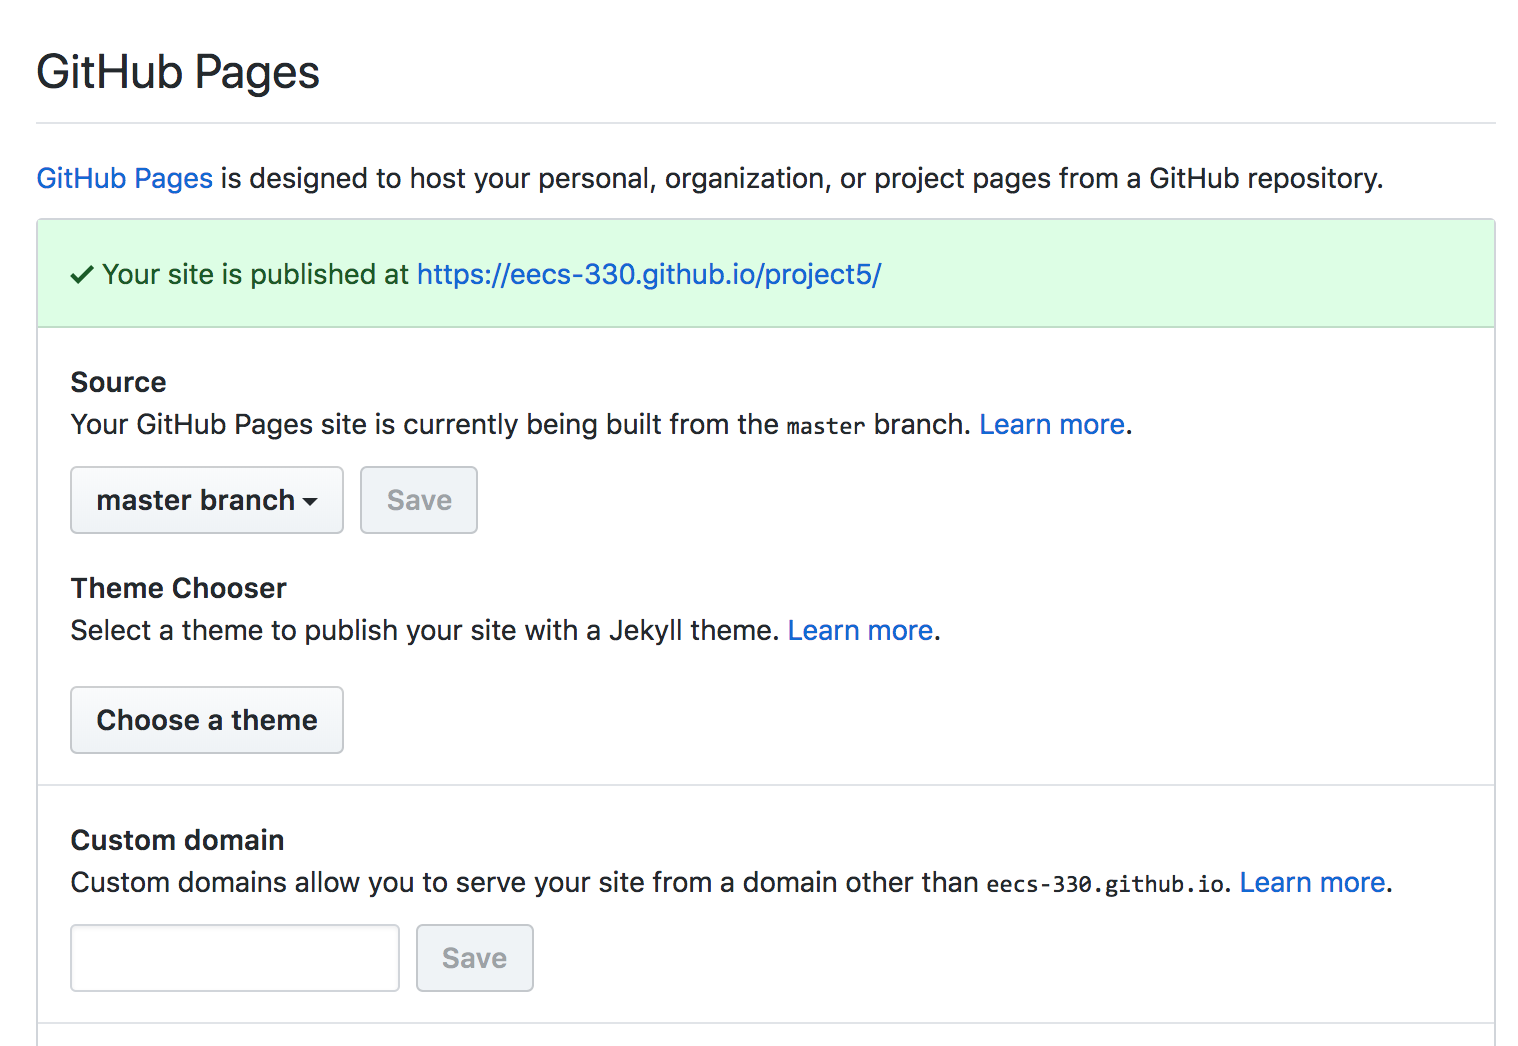
- This will generate a link to your GitHub site. A few caveats: GitHub pages are a bit buggy. For whatever reason, for the first few hours after you enable github pages , you’ll have to tack on a index.html after the root website so that you don’t get a HTTP404 (page not found) error. Eventually, GitHub pages will resolve the root URL.
- GitHub pages does not support backends, so if you want a more complex prototype that requires installing backend software, you might want to use something else (e.g. Heroku, Docker, etc.)
Create a branch to submit [What to Turn In]
When you’re done with steps 1-7 and every person on your team has both (a) created a Pull Request with a code change, and (b) reviewed someone else’s Pull Request and merged it, you are ready to submit your lab to Canvas. Please read the submission instructions carefully. Note that only one person on your team will need to do this:
- On your local computer, checkout your master branch and rebase
$ git checkout master $ git pull - Next, create a submission branch. Call it git_tutorial, and check it out:
$ git branch git_tutorial $ git checkout git_tutorial - Push your git_tutorial branch to your repository (so that it gets created on the Organization’s repo):
$ git push origin git_tutorial - Go to your Organization’s repo and verify that your git_tutorial branch got created. Then, submit a link to (1) your team’s GitHub repository, and (2) your team’s GitHub pages link to Canvas.
- The git_tutorial branch serves as a snapshot in time for us to assess. Moreover, now that everything is set up and archived, feel free to any of the files in your master branch and begin working on your computer prototypes (which will not affect your git_tutorial branch).
WHAT TO TURN IN: One person from your team will paste a link to your git_tutorial branch in Canvas.
Summary of Suggested Workflow
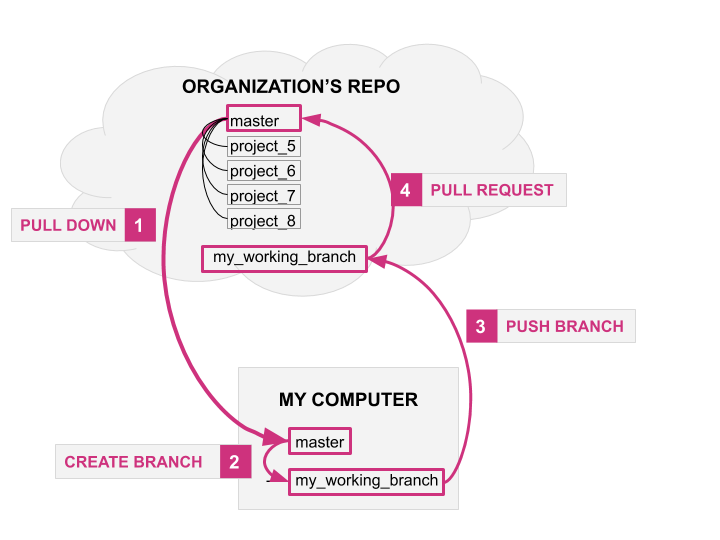
- Never make edits to the master branch. Make any code additions, subtractions, etc. on a separate branch.
- When you are making any edits to your team’s repo, you will make them in your fork of the repo by:
- Creating a new branch
- Committing files to your new branch
- Pushing them to Github, and
- Making a PR
- Asking someone on your team to review, approve, and merge your PR.
- Once your PR has been merged, you will rebase on your local machine as follows:
# switch branches back to master (IMPORTANT) $ git checkout master # fetch all of the changes from your organization’s (i.e. upstream) master $ git pull --rebase upstream master # pushes your organization’s version of the code onto *your repo (so that # your master and organization’s master are in sync) $ git push - Then, to create new features, you will create a new branch, copied from master:
# make sure you are currently on the master branch, and that # you make all of your new branches from master $ git branch # create your new branch: git branch <name-of-new-branch> # check out your new branch and get to work: git checkout <name-of-new-branch> - Each week, you will submit a branch of your code called (project_5, project_6, or project_7) that we will assess.