Assignments > HW2. Making a User Interface
Due on Thu, 02/11 11:59PM.
This week, you will be making a front end for your blog. You may work in pairs if you like, but you will have to turn in your own versions of the code (i.e. link to YOUR Heroku instance / Github files).
I. Get Set Up
Download the starter files, which you will integrate to your current app as follows:
1. Copy folders into your existing project
Save the static and templates directory in your cs330-web-server folder. Your directory structure should look something like this:
├── Procfile
├── README.md
├── app.py
├── db.py
├── models.py
├── requirements.txt
├── static
├── templates
├── testing
└── views
2. Edit your app.py file
You’ll need to make 2 changes to your app.py file:
First, make sure you import render_template from the flask module:
# make sure you import render_template from flask
from flask import render_template
Second, add the functions and routes shown below. These will assign your front-end templates to url paths. I’ve included a sample app.py file for you to use as a guide.
@app.route('/')
def list_posts():
    return render_template('get-posts.html')

@app.route('/add-post/')
def create_post():
    return render_template('create-post.html')

@app.route('/post/')
def get_single_post():
    return render_template('post-detail.html')
Note: It is often the case that the front end of a web app is completely separate from the back end. However, for the sake of simplicity, we’ll just keep everything together.
3. Verify that your front-end works
When you’re done, run flask…
export FLASK_APP=app.py
export FLASK_ENV=development
flask run
…and navigate to the root of your website…
You should see the following screens:
List View
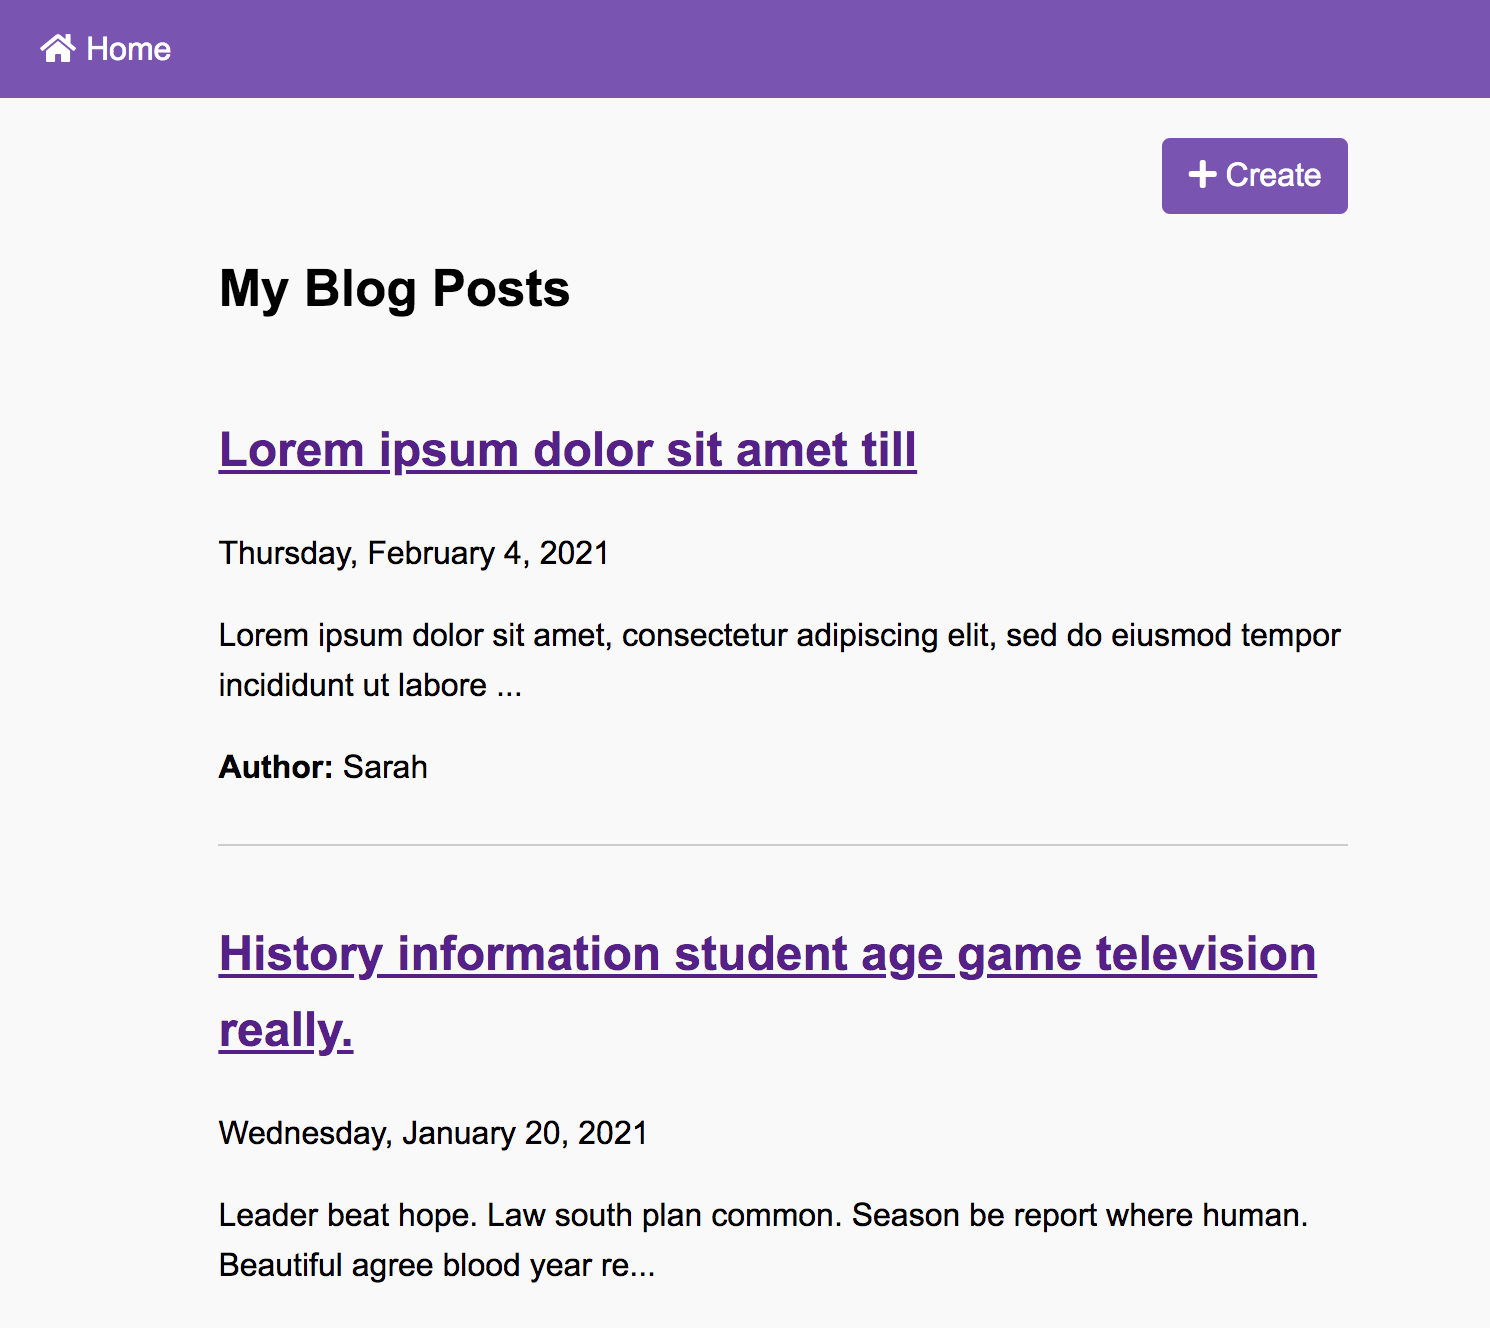
This page is controlled by:
- Template:
templates/get-posts.html - JavaScript:
static/js/get-posts.js
View / Edit / Delete a Single Post
If you click on one of the blog post links, you shoud see…
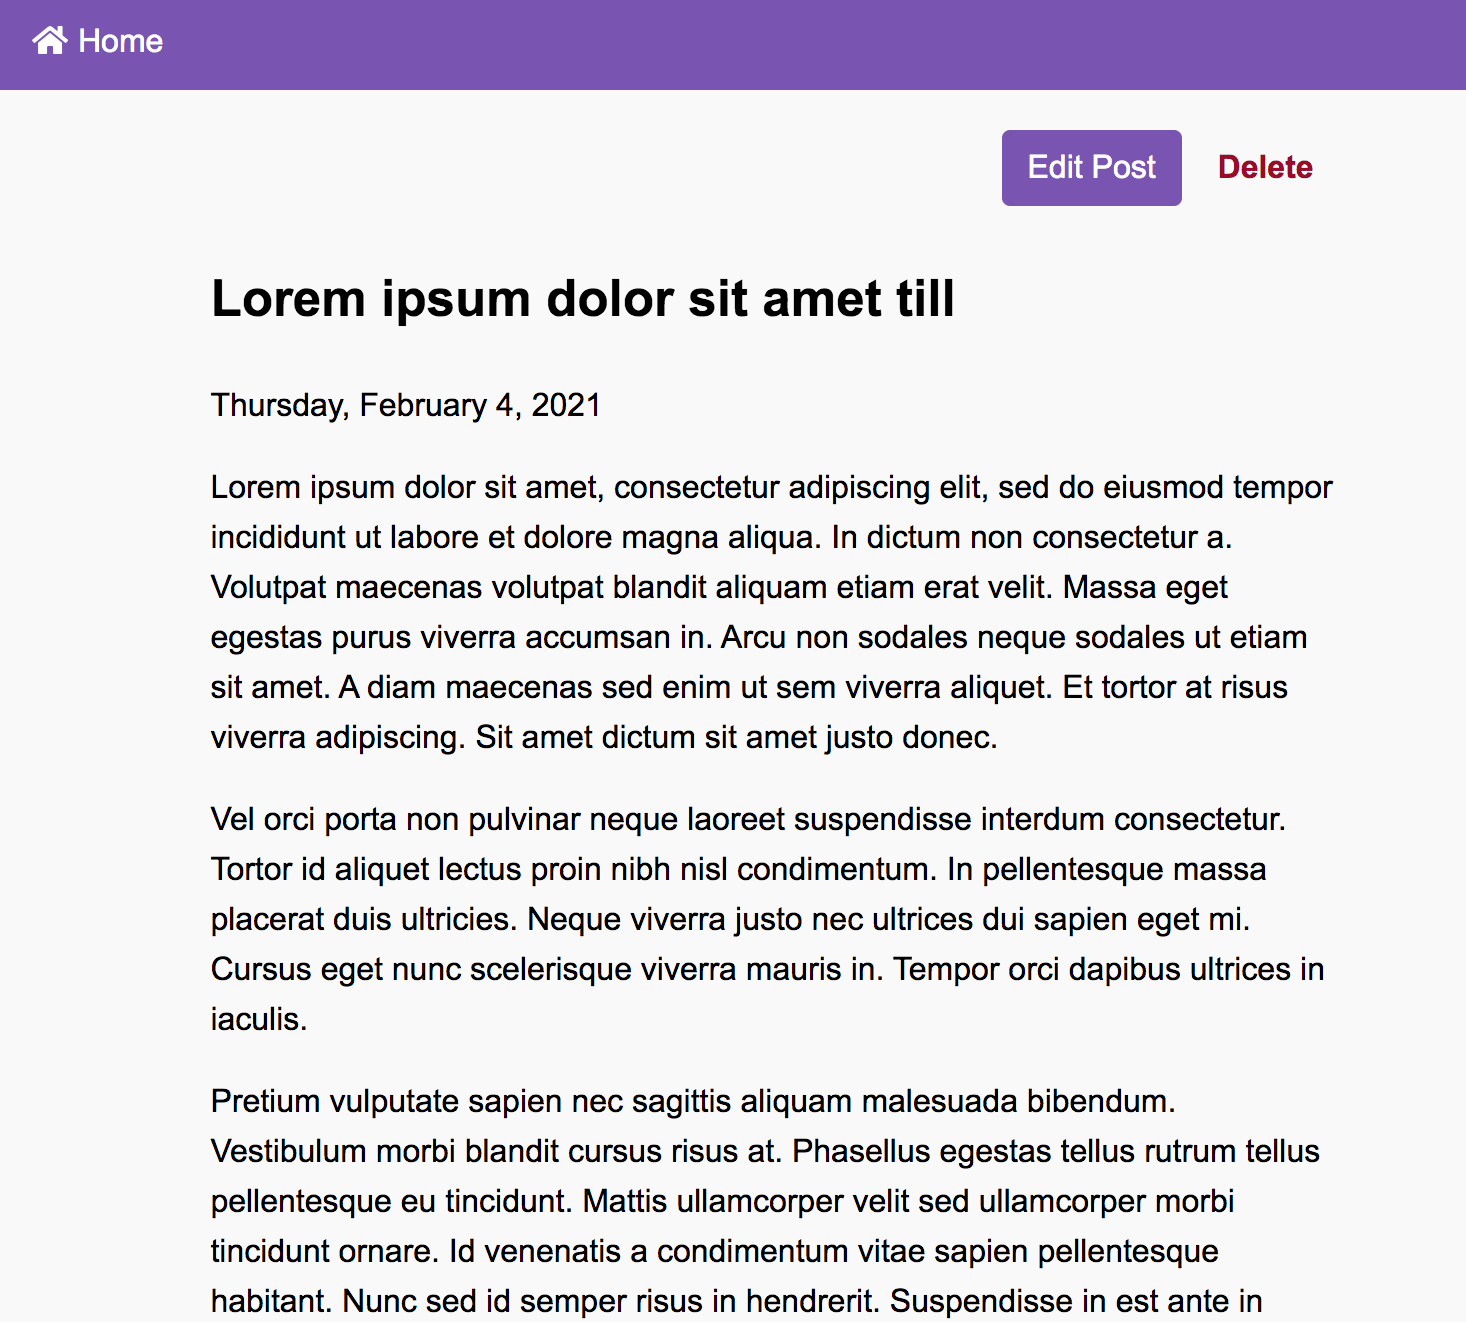
This page is controlled by:
- Template:
templates/post-detail.html - JavaScript:
static/js/post-detail.js
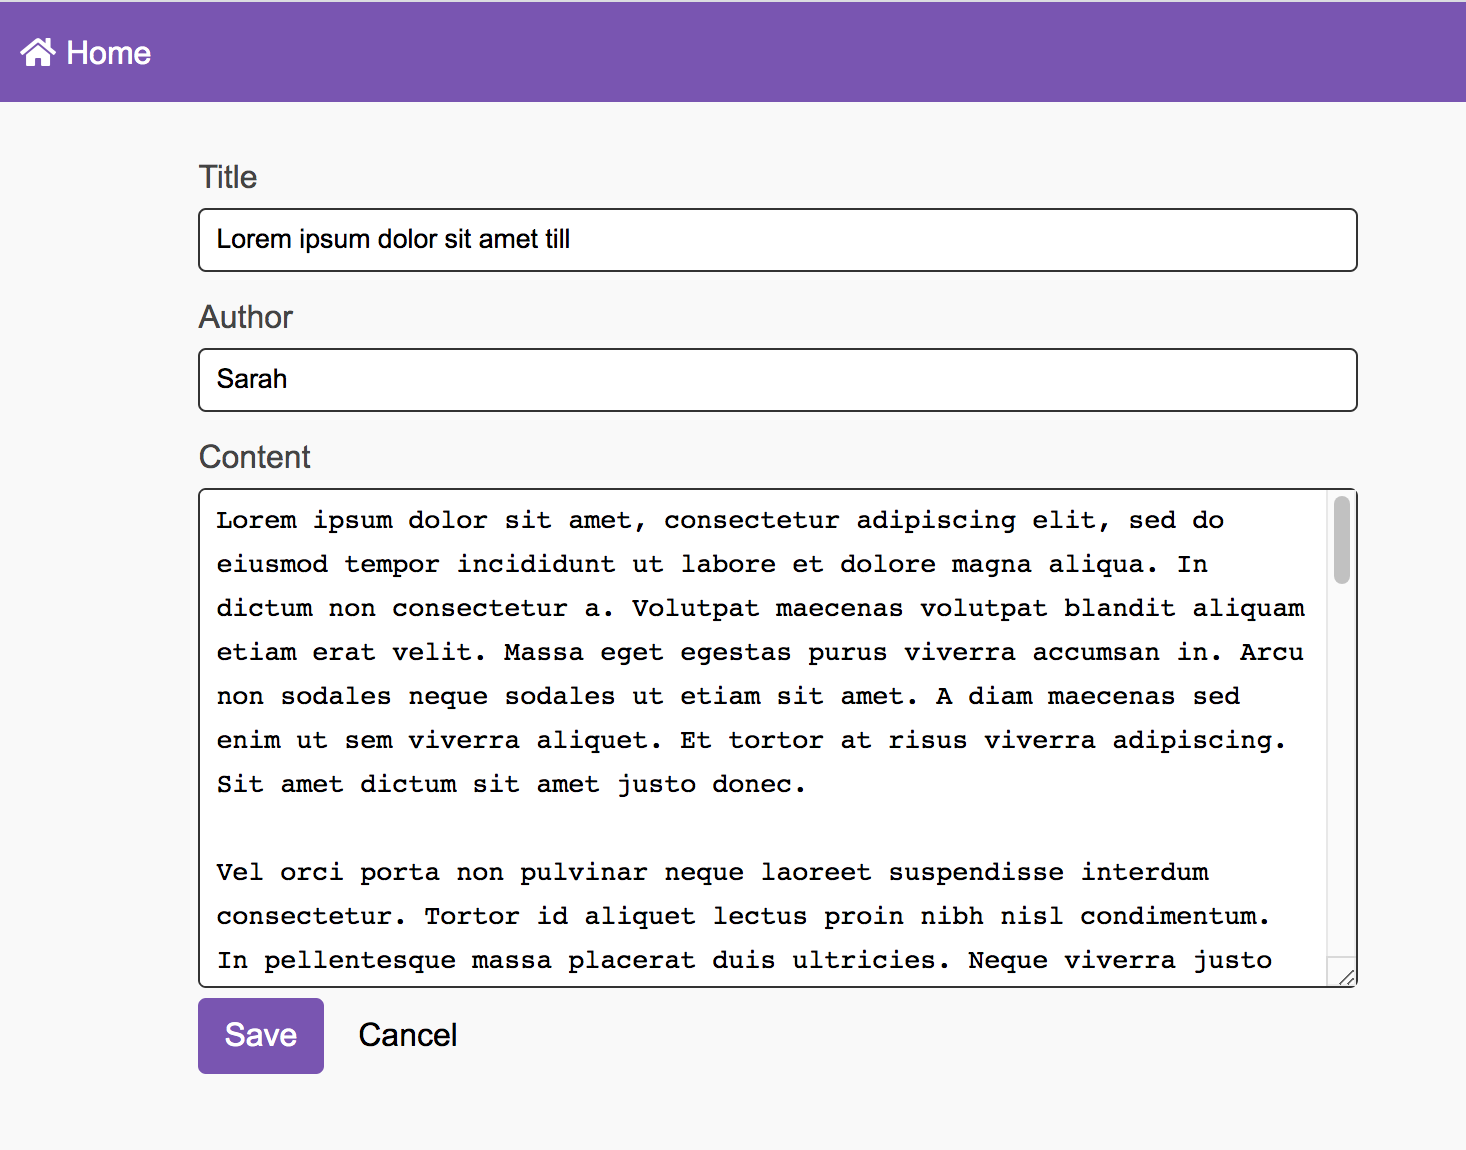
Create a New Post
And if you click the add button, it will take you to this page: http://127.0.0.1:5000/add-post/

This page is controlled by:
- Template:
templates/create-post.html - JavaScript:
static/js/create-post.js
4. Commit your changes to GitHub and Heroku
From your command line, navigate to your cs330-web-server1 folder and commit your changes:
# check in your new files and add them to git:
git add .
git commit -am 'Adding Posts Front End'

# push your files to Github:
git push origin master

# and also push your files to Heroku
git push heroku master
And finally, verify that your Heroku deployment works by navigating to your website on Heroku and testing.
II. Your Task
I have already implemented GET, POST, PUT, and DELETE for the Blog Post resource. Your job will be to create a commenting UI for the blog, using plain HTML, CSS, and JavaScipt. Please complete the following tasks (see demo video):
- Display all of the comments associated with the selected blog post.
- Allow the user to create a comment.
- Allow the user to delete a comment.
1. Display the comments associated with the post
Modify post-detail.html and post-detail.js so that all of the blog post’s comments are displayed below the blog post.
Hints:
- To make testing easier, make sure that comments already exist for the blog entry.
- Add a div tag (or some container tag) to
post-detail.htmlto serve as the target element for your comments. All of your comments will be added inside of the target element. - Add some functionality to the
post-detail.jsfile to display the comments.- To get ideas, open
get-posts.jsand study how thegetPostsanddisplayPostsfunctions interact with theget-posts.htmlfile.
- To get ideas, open
- Add some style blocks in
css/style.cssto style your comments.
2. Allow the user to create a comment
Modify post-detail.html and post-detail.js so that the user can add a comment.
Hints:
- Add a form to the bottom of the screen. You can just always show the form if you want (no need for the user to first click “Add Comment” unless you want to).
- Create a function that can create a comment (event handler).
- Attach the event handler to the “Save” button’s click event.
- After the event handler fires, redraw the screen to show that the comment has been added.
3. Allow the user to delete a comment
Modify post-detail.js so that the user can delete a comment. In the “real world”, the user should only be able to delete their own comment, but for now, let them delete any comment.
Hints:
- Add a button to each comment (in the video, I added a button that looked like a trash can).
- Create a function that can delete a comment (event handler).
- Attach an event handler to each comment button’s click event.
- After the event handler fires, redraw the screen to show that the comment has been deleted.
4. Commit your changes to GitHub and Heroku
When you’re done, commit your changes to GitHub & Heroku (same flow as before).
What to Submit
Please paste the following links into Canvas:
- A link to your GitHub repo.
- A link to your live Heroku server.
- If you collaborated with one of your classmates, list your collaborator.