Assignments > Lab 1. Configure Your Software Stack
Due on Fri, 01/15 11:59PM.
Background Readings
These are for your reference, if you want to read more about the technologies we’re using.
- MongoDB Introduction & Guide
- Flask (Python Library) intro and documentation
- Background reading on RESTful architectures:
- Deploying to Heroku (for next week): Step-by-Step Guide.
We will go over this more next week.
One of the goals of the course is to help you to analyze the human dimensions of data-intensive computing applications. To do this, each of you will set up a ‘full stack’ application – to practice (1) thinking through design decisions at different parts of your system, and (2) how the different pieces of a data-intensive system function as a whole.
While this is not a software engineering or programming course, you will nonetheless be examining and writing code to instantiate particular design principles. Moreover, given that you will be creating a final project prototype, we hope that these labs will be useful for helping you get familiar with some relevant software tools and techniques.
In today’s lab, you will be completing the 3 steps below. Please note that configuring your laptop and getting all of the pieces to work together can be frustrating and time consuming. We’re here to help, and want to ensure that everyone is successful. This lab is not meant to be evaluative – it’s meant to help you get familiar with a set of tools which are widely used in industry. If there’s anything that you don’t understand, we can explain it to you or point you to more resources.
I. Set Up MongoDB
MongoDB is a NoSQL database program that organizes collections of JSON-like documents with optional schemas. There are many different kinds of databases we could have selected, but we’ve selected MongoDB because of its flexibility (useful for prototyping). Because you will eventually be building a cloud-hosted, publicly accessible system, we’re going to go ahead and create a cloud MongoDB instance on MongoDB Atlas. That said, you may also want to install MongoDB locally (optional).
1. Register w/MongoDB Website
Login or signup for a MongoDB account.
2. Create a Project
Click on the “create a new project button”. Type in the name of your project as “CS330” and click next. Ignore the add teammates prompt and finish the setup.
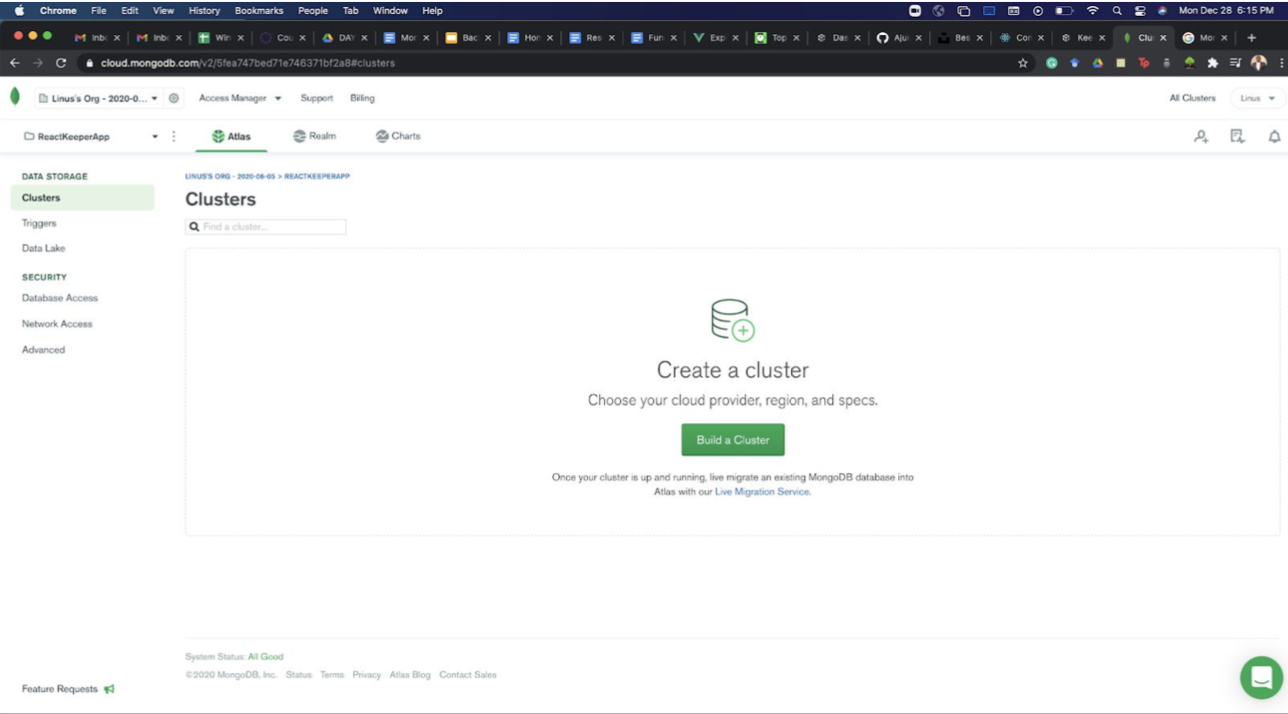
3. Build a Cluster
Click on Build a Cluster. Select the free options on the next page.
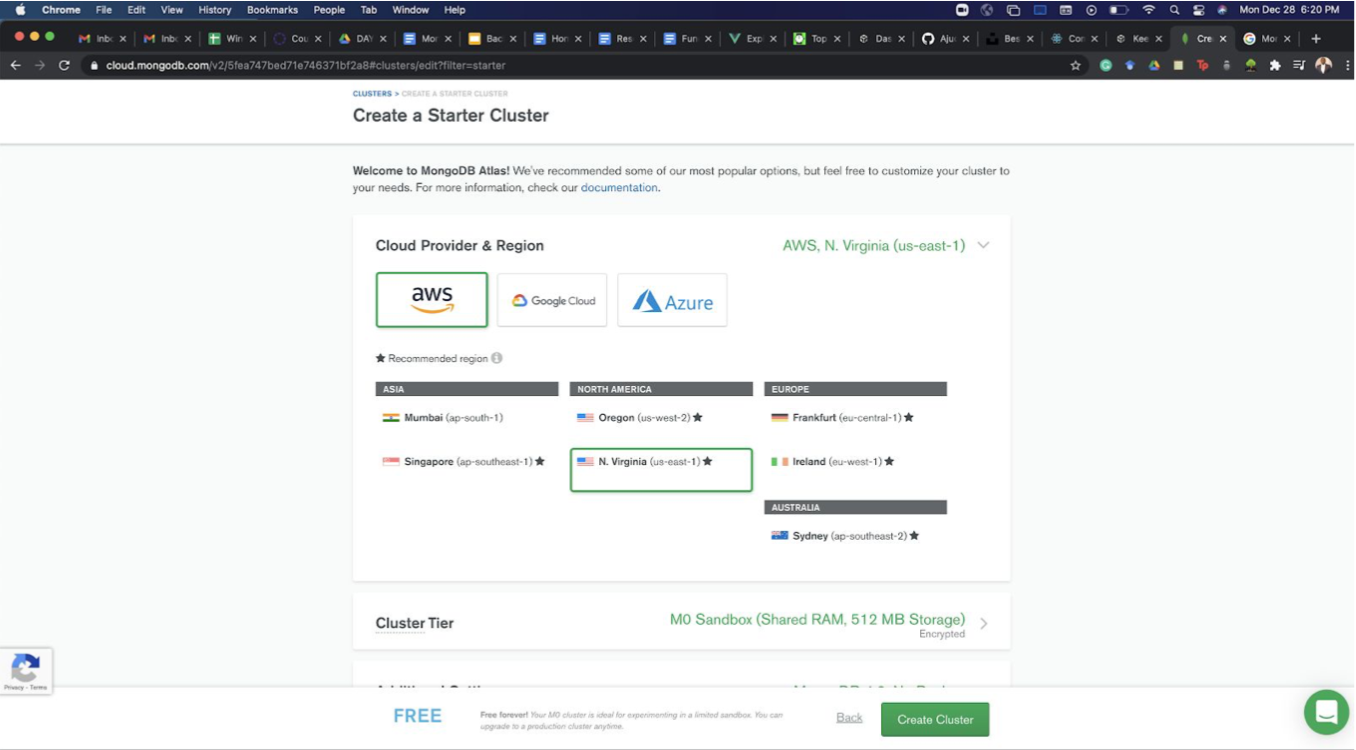
Do not change anything on this page and proceed to create a cluster. It might take several minutes so grab some coffee and relax.
4. Create a Database User
Next, set up a user and password that will be used by your web applications to access the database.
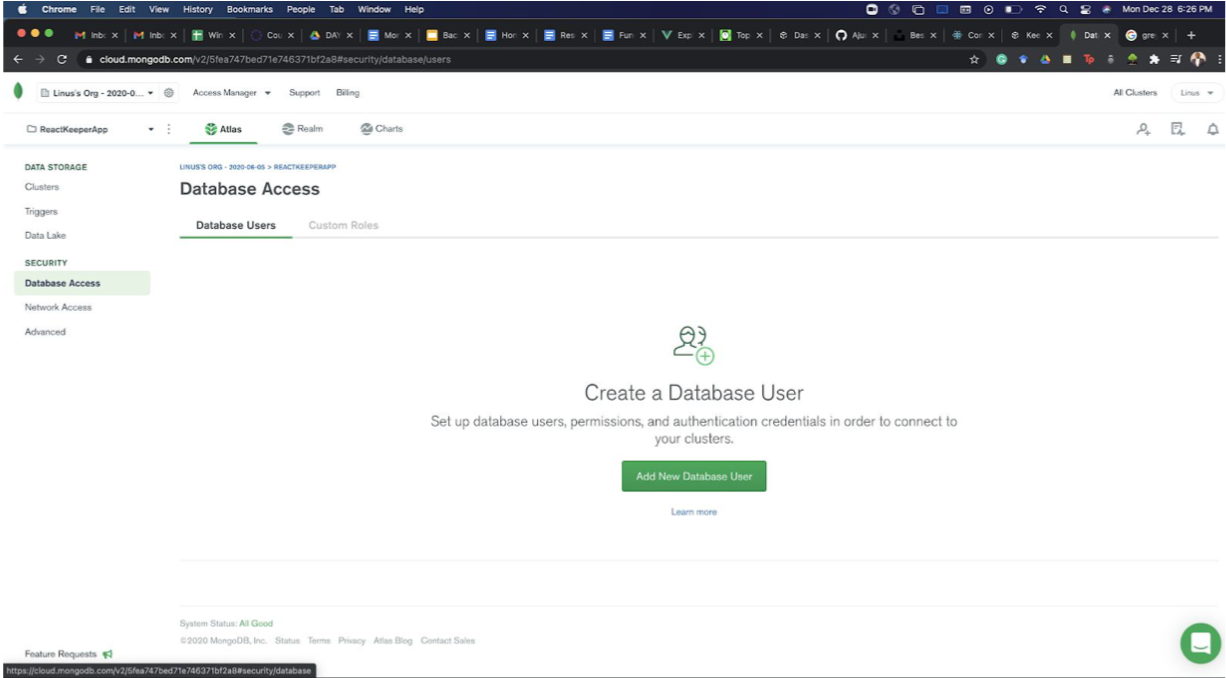
Click on “Database Access” under SECURITY. Then click “Add New Database User”.
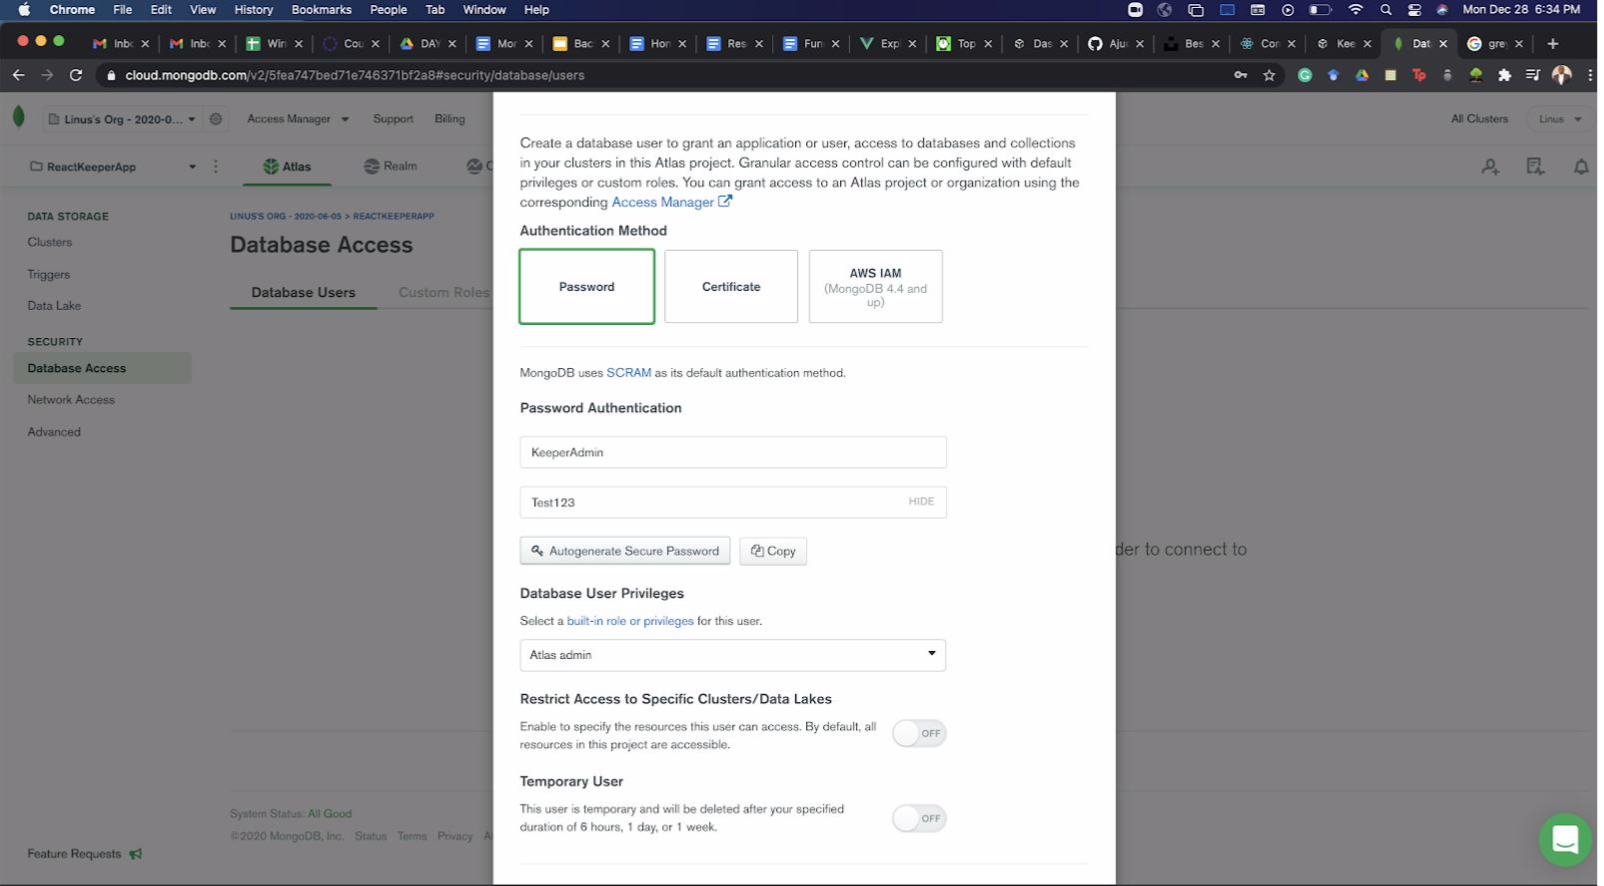
Follow these configurations and use your unique username and password.
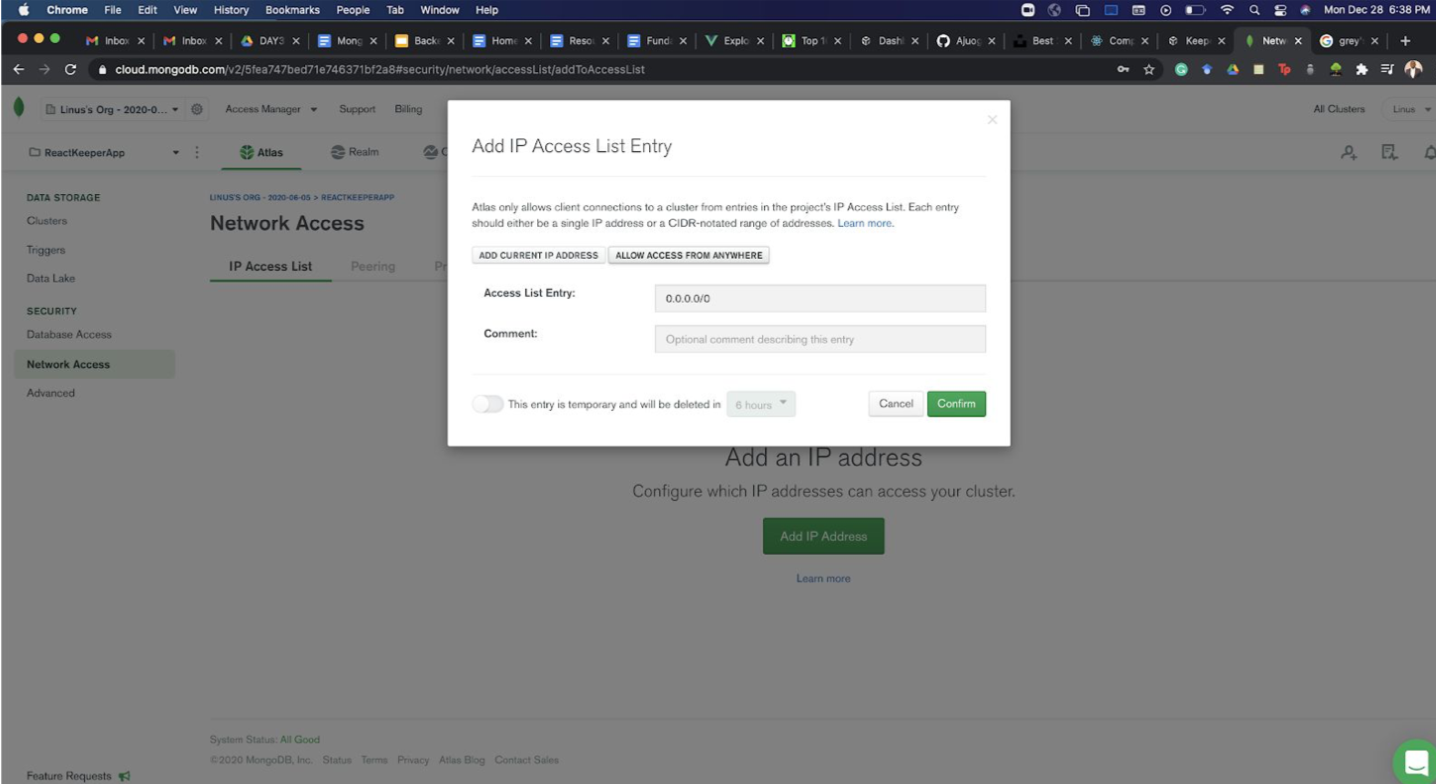
5. Grant Network Access
Finally, click “Network Access” just below the “Database Access” and click Add IP Address and then click “Allow access from Anywhere”. When deploying your backend to servers you will not have to reconfigure the IP address. Confirm to close and complete that step. This might take another few minutes so continue watching your TV show.
We will use databases stored in this cluster in upcoming labs and homework assignments. Meanwhile, if you are curious about how to interact with MongoDB, take a look at their documentation on CRUD operations (CRUD = “Create, Read, Update, & Delete”).
II. Set Up a Local Python Web Server
Download the lab01.zip file, unzip it, and move this folder to a place where you regularly save files for coursework (stay organized – you’ll be working with a lot of files in this class). Please rename your lab01 directory to cs330-web-server
IMPORTANT: please don’t save your cs330-web-server folder inside of a folder which is already being managed by git. You will eventually be creating a new git repo to manage and deploy your cs330-web-server code, and having nested git repositories is discouraged.
To configure your web server, please complete the following steps:
1. Install dependencies using PIP
Open your terminal / command line and navigate to the cs330-web-server directory. Then, using the terminal, you will install all of your Python dependencies as follows:
# from the command line...
cd <some-path>/cs330-web-server   # navigate to your cs330-web-server directory
pip3 install -r requirements.txt  # install the python dependencies
If you open the requirements.txt file and take a look at it, you’ll note that you are installing a library called Flask, some libraries that support MongoDB-Python interoperability, and a few other utility libraries.
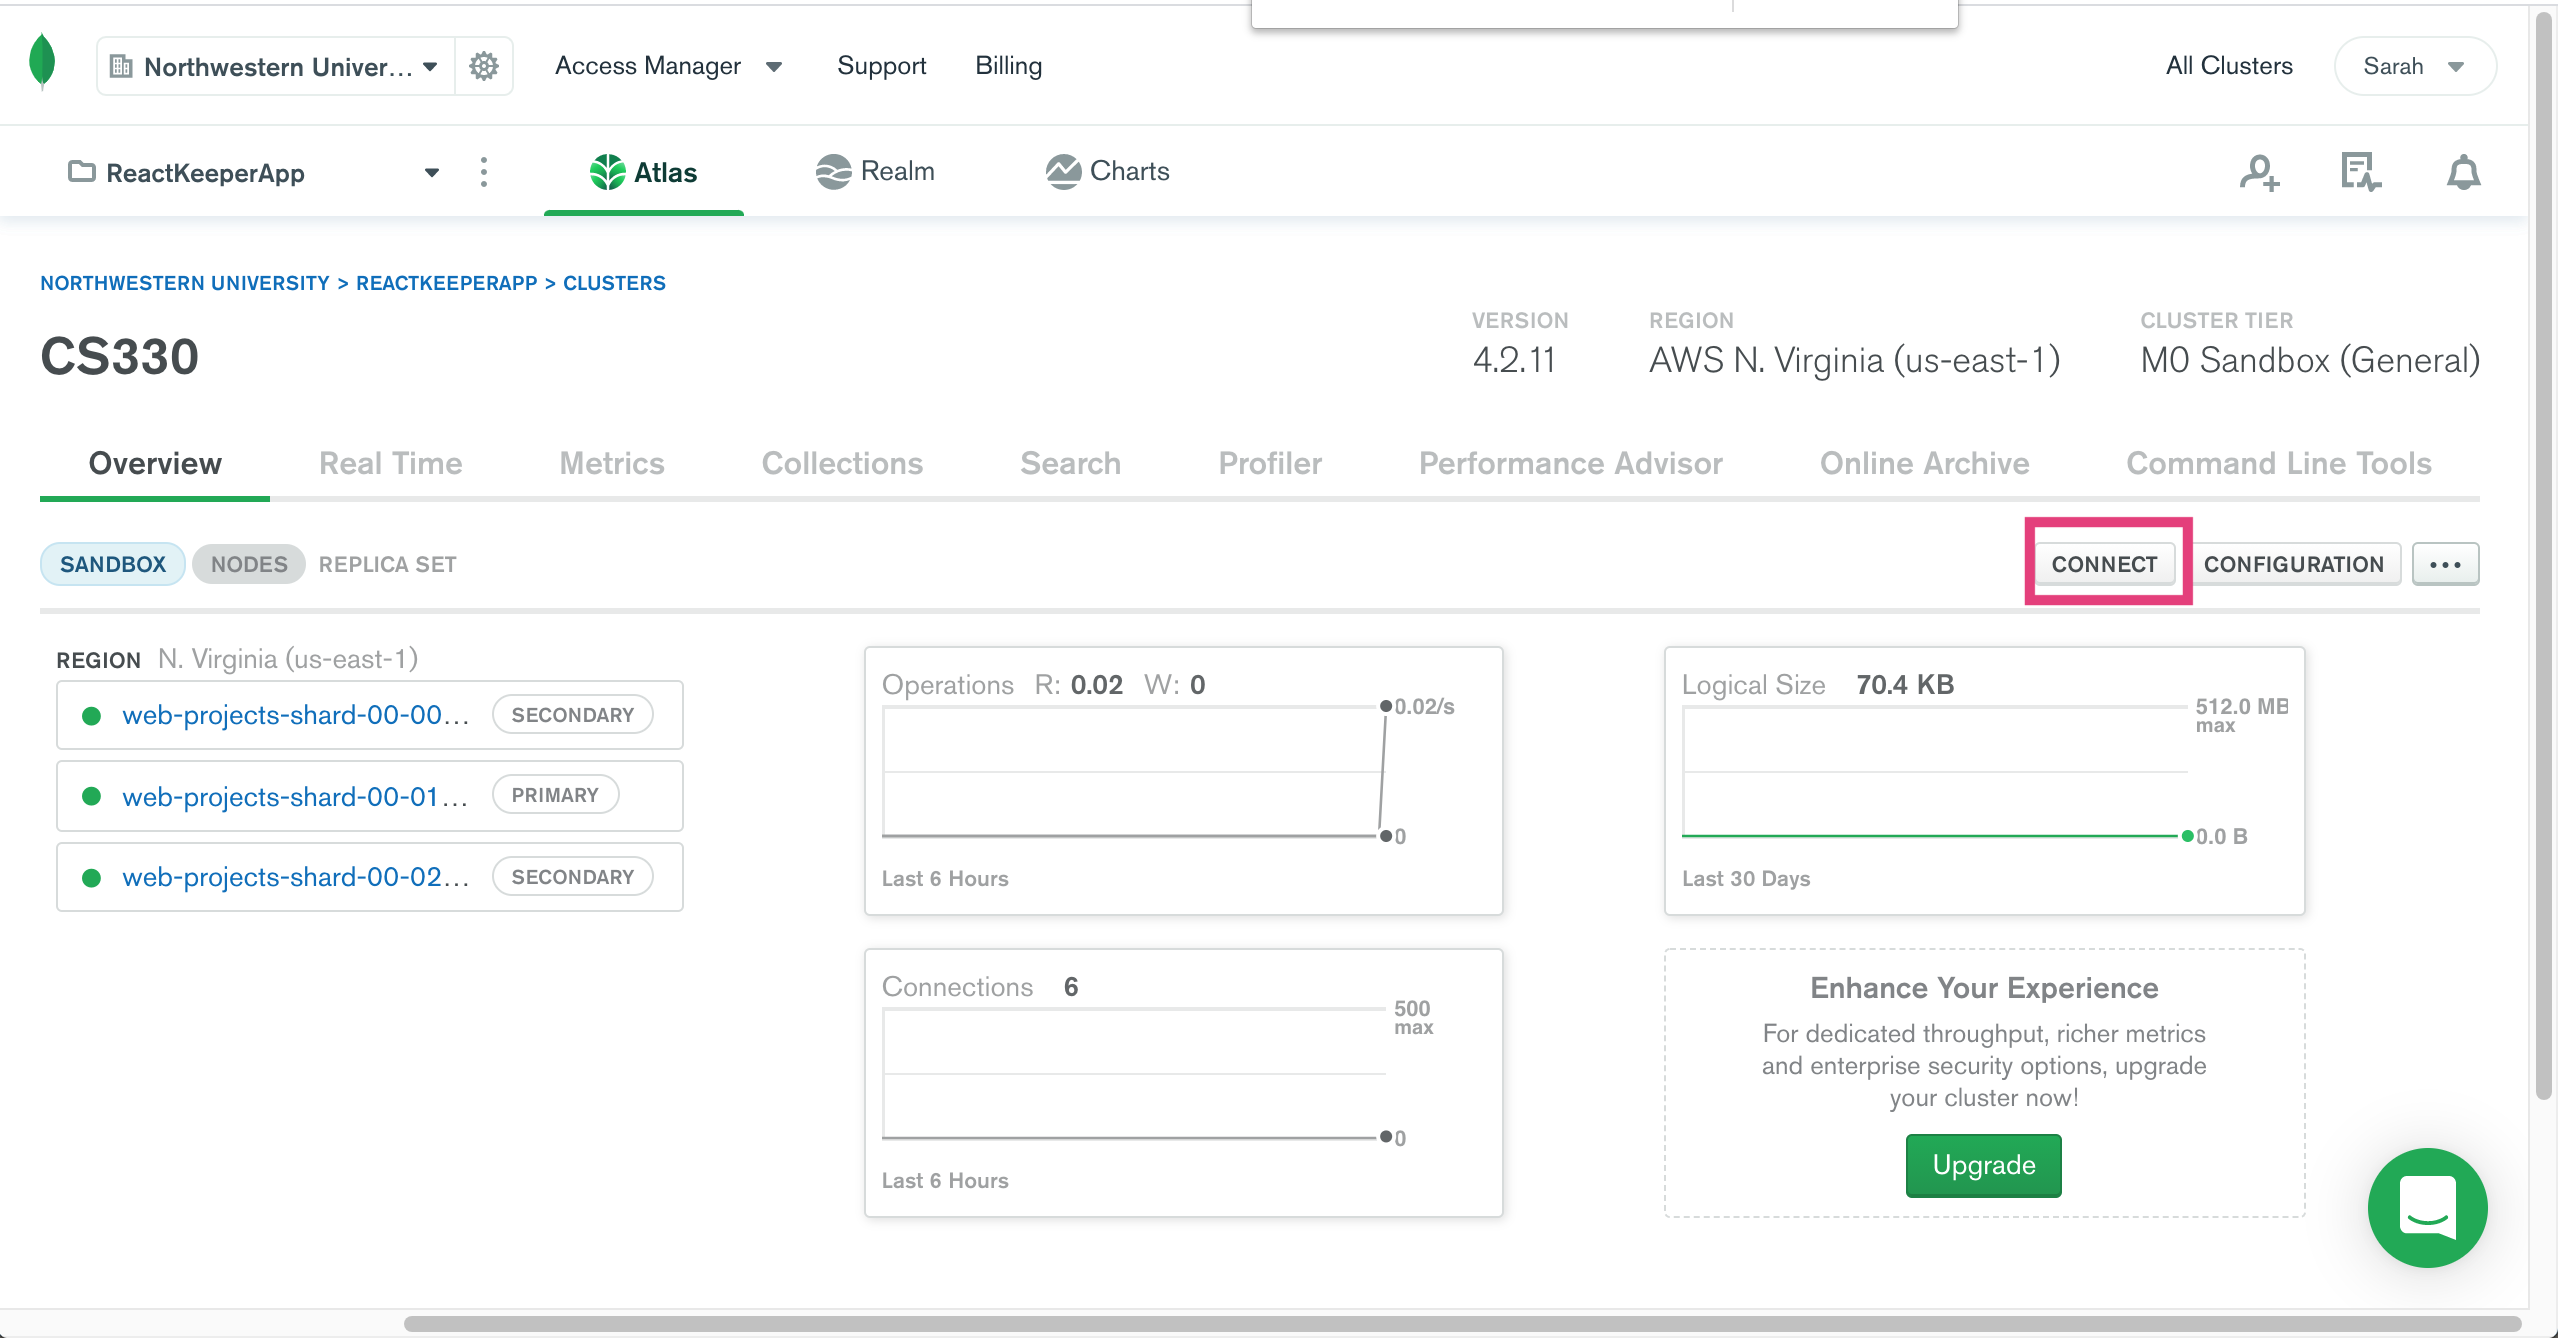
2. Find your MongoDB connection string
Go to MongDB Atlas and find your connection string. To do this:
- Click on the “Clusters” link (left-hand navigation)
- Click on the project you just made (“CS330”)
- Scroll to the right until you see a button called “Connect”. Click the “Connect” button.
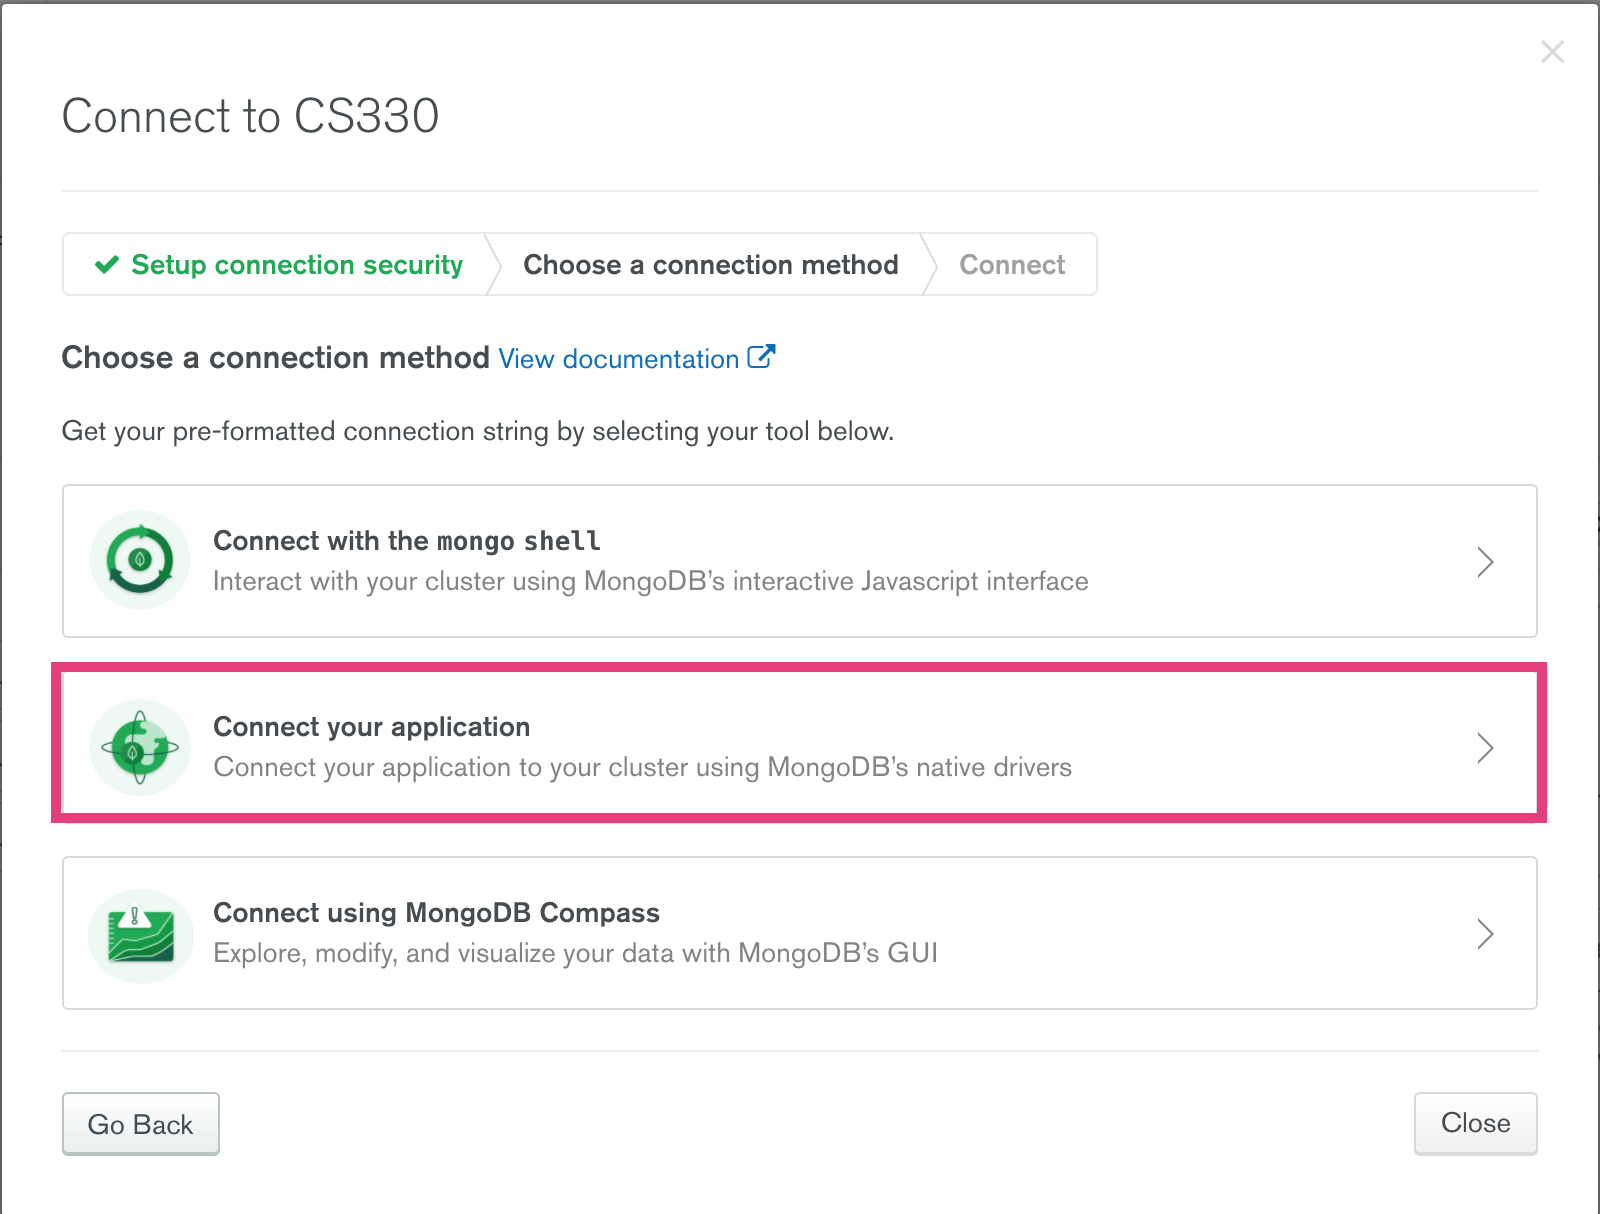
- Next, click the “Connect to Application” option:
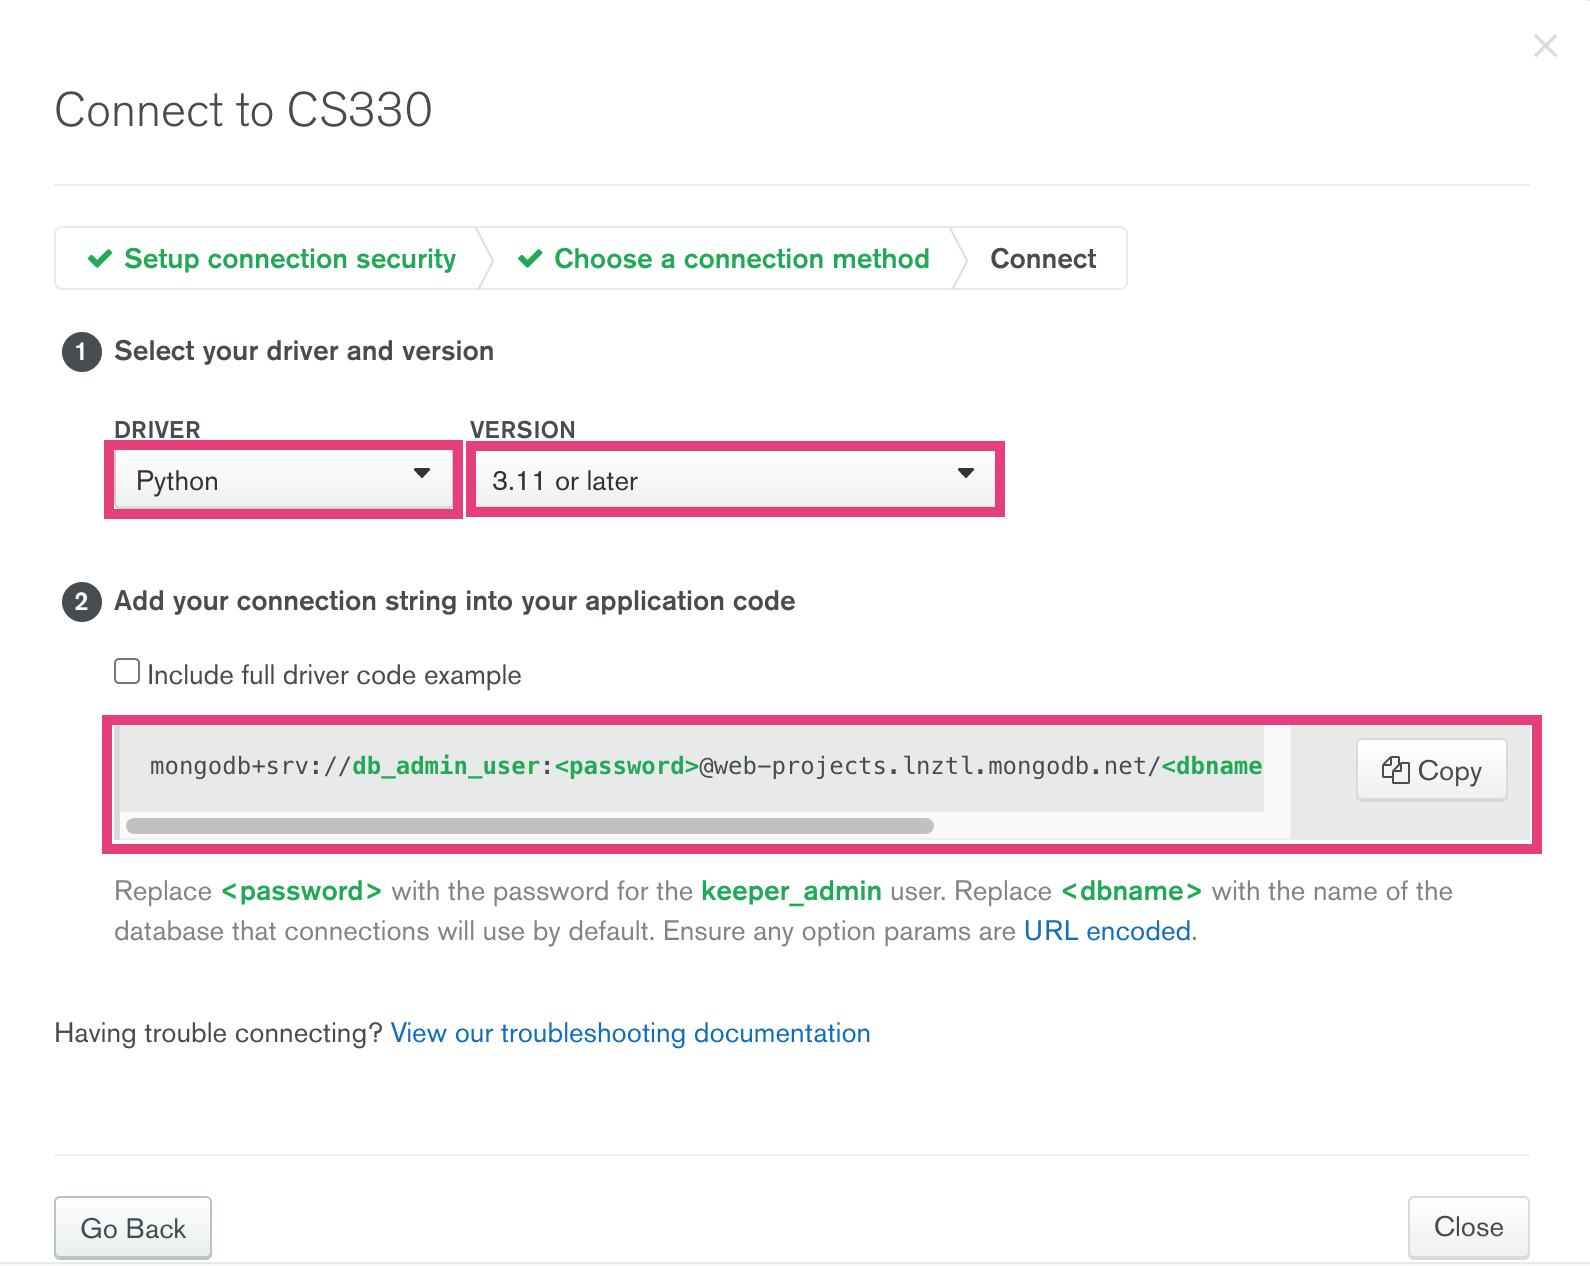
- Finally, select the Python options and copy your connection string:
3. Connect your application to your database
My connection string (copied from MongoDB Atlas) is this…
mongodb+srv://db_admin_user:<password>@cs330.lnztl.mongodb.net/<dbname>?retryWrites=true&w=majority
…and while I could copy this connection string directly into my web application in the cs330-web-server/db.py file, I don’t want to store my database connection information in my GitHub repository (a big No-No). As an alternative, we’re going to use environment variables to store our database credential information by making a .env file at the root of our web application. Inside your .env file, please add the following environment variables (but replace <your_password>, <your_database_username>, and <your_host_address> with the values that pertain to the DB connection string you just copied from MongoDB Atlas):
# Your environment variables (edit this), extracted from your DB connection string
HOST=<your_host_address>
DATABASE_NAME=cs330_assignment1
DB_PASSWORD=<your_password>
DB_USERNAME=<your_database_username>
Here is what Sarah’s .env file looks like:
# Example: Sarah's environment variables, extracted from:
# mongodb+srv://db_admin_user:<password>@cs330.lnztl.mongodb.net/<dbname>?retryWrites=true&w=majority
HOST=cs330.lnztl.mongodb.net
DATABASE_NAME=cs330_assignment1
DB_USERNAME=db_admin_user
PASSWORD=my_secret_password
Note that in the .gitignore file, the .env file is excluded, which means that this file will not be checked into your repo. Please also take a look at cs330-web-server/db.py to see how your environment variables are used to dynamically build your connection string:
# cs330-web-server/db.py
import os
from flask_mongoengine import MongoEngine

def init_database_connection(app):
    app.config['MONGODB_SETTINGS'] = {
        'db': os.environ.get('DATABASE_NAME'),
        'host': 'mongodb+srv://' + os.environ.get('HOST') + '/' + os.environ.get('DATABASE_NAME') + '?retryWrites=true&w=majority',
        'username': os.environ.get('DB_USERNAME'),
        'password': os.environ.get('DB_PASSWORD')
    }
    db = MongoEngine()
    db.init_app(app)
4. Run your web app
Finally, you are ready to run your web application. To do this, please navigate to your cs330-web-server directory on your command line and type the following:
# Note: make sure you run these commands from the root of your cs330-web-server directory
export FLASK_APP=app.py
export FLASK_ENV=development
flask run
If successful, you will see output similar to this:
Sarahs-MacBook-Pro-4:cs330-web-server vanwars$ flask run
 * Serving Flask app "app.py" (lazy loading)
 * Environment: development
 * Debug mode: on
 * Running on http://127.0.0.1:5000/ (Press CTRL+C to quit)
 * Restarting with stat
 * Debugger is active!
 * Debugger PIN: 273-580-071
5. Test your web app’s database connection
To test your web app has been successfully configured, we will check 2 things (a) that the endpoints are working, and (b) that you can create a new database record using the http://127.0.0.1:5000/api/posts/ endpoint:
a) Navigate to the following endpoints
- http://127.0.0.1:5000/
Should give you the output “This is your API Homepage” - http://127.0.0.1:5000/api/posts/
Should show you an empty list: []
b) Post some data
In a code editor of your choice, open the cs330-web-server/testing/client.py file and take a look at it. The job of this file is to interact with your database using the http://127.0.0.1:5000/api/posts/ endpoint.
Run this file on the command line:
# from the cs330-web-server/testing on your command line:
python client.py
If your database connection is successful, you will see data output to the screen. Navigate to the http://127.0.0.1:5000/api/posts/ endpoint again and verify that you now have a post.
If the steps above did not work, the most likely error is a database connection error. Go back and take a look at your
.envfile and make sure that you’ve correctly typed in your credentials.
III. Set Up Git and GitHub Repos
You are going to be using git (and some ther command line tools) to manage versions of your code, and to interact with GitHub (and later with Heroku).
1. Install / Register
If you haven’t already:
- Install git on your computer: https://git-scm.com/book/en/v2/Getting-Started-Installing-Git
- Register for GitHub: https://github.com/join
2. Do the Tutorial (Optional)
If you’ve never used GitHub or are relatively new to it:
- Do the GitHub tutorial. It is optional, but recommended for anyone new to GitHub.
- Refer to the Git Cheat Sheet if you have questions about specific commands.
3. Configure Your Git and GitHub
Many of you already have a process for doing this, so feel free to do your own thing here. That said, if you’re relatively new to this, here are some instructions:
GitHub
- In your web browser, navigate to GitHub and create a new repository (see tutorial above if you don’t know how).
- Please make sure that you mark your repo “public.”
Locally
When you’re done, open your command line (on your local computer) and navigate to your cs330-web-server directory. Then:
- Initialize a brand new git repo:
git init - Connect your local repo to your GitHub repo:
git remote add origin <address-of-repo-on-github> - Add all of your files to your local repo:
git add . - Type
git status, which will show you all of the files that your git repo is currently tracking. - Commit all of them:
git commit -am 'My first commit'. Committing them is like “saving” them to a version (if you ever needed to later revert to a previous version of your code). - Push them to GitHub:
git push origin master. “Pushing” transfers all of your committed files to your GitHub repo (on the cloud).
If you make any additional code changes, simply repeat steps 3-6 above.
IV. Review the Checklist & Submit
Please verify that you have completed all of the steps, and then submit your work to Canvas:
1. Verify that you’re done
- App Configuration
- You can run it locally (this works when you’re running Flask: http://127.0.0.1:5000/)
- The commands listed in the “test your web app” section work (you can successfully create and read resources in your MongoDB database).
- GitHub Configuration
- Your files have been committed and pushed to GitHub
- You have taken care to not include your database password in your repo by creating a local, hidden file,
.envthat is excluded from your GitHub repo in the.gitignorefile.
2. Submit to Canvas
When you are sure you have completed everything, please submit the link to your GitHub cs330-web-server repository.